Mod Guide: New-Style SNES RGB Bypass Amplifier
This summer, as part of our activities with the Residual Media Depot, Alex Custodio and I are modding several videogame consoles while closely documenting our work. The goal of this project is to create a series of succinct, approachable modding guides that detail the tools and techniques needed for hardware modding.
New-Style SNES RGB Bypass Amplifier
A common way to send video from a Super Nintendo Entertainment System (SNES) to a television is using composite video—the yellow cable featured alongside the red and white audio ones on the system’s Multi-Out. Composite, as the name implies, sends all the console’s video information through a single signal. Modders have long lamented the poor quality of composite video and have uncovered hidden affordances within the SNES that allow it to output higher quality video by splitting it into two signals (chroma and luma with S-Video) or three signals (red, green, and blue with RGB).
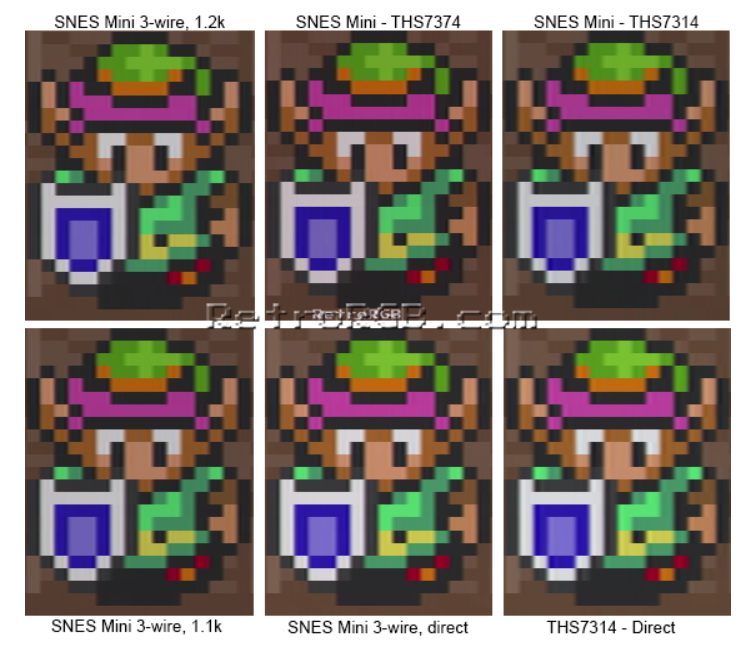 |
| Comparison collage courtesy of RetroRGB |
This mod is one of many that enables and amplifies an RGB signal from within a SNES, specifically a New-Style SNES (often referred to as a SNES Mini or SNES Jr), using a pre-packaged kit. The mod effectively connects unused video outputs on the SNES’s PCB and routes them to the Multi-Out. The end result is a console that outputs an RGB video signal, although you will need a SCART Multi-Out to take advantage of it.
While some of the solder points can be a touch finicky due to size and space limitations, this is a remarkably cheap, streamlined, and easy-to-complete mod. After you place the RGB Amp on the SNES’s PCB, all you need to do is solder a handful of wires and two rows of aligned pins. We managed to complete the mod in just over an hour—a refreshing change of pace after our incredibly involved Consolizer mod.
Materials
- New-Style SNES (SNS-101), AKA SNES Mini or SNES Jr
- SNES Jr THS7374 RGB Upgrade Kit
- Soldering iron and solder
- Wire strippers
- Flush cutters
- Fine gauge wire
- Kapton tape
- 4.5mm Security Bit screwdriver
- Phillips Head screwdriver
- SCART Multi-out Cable
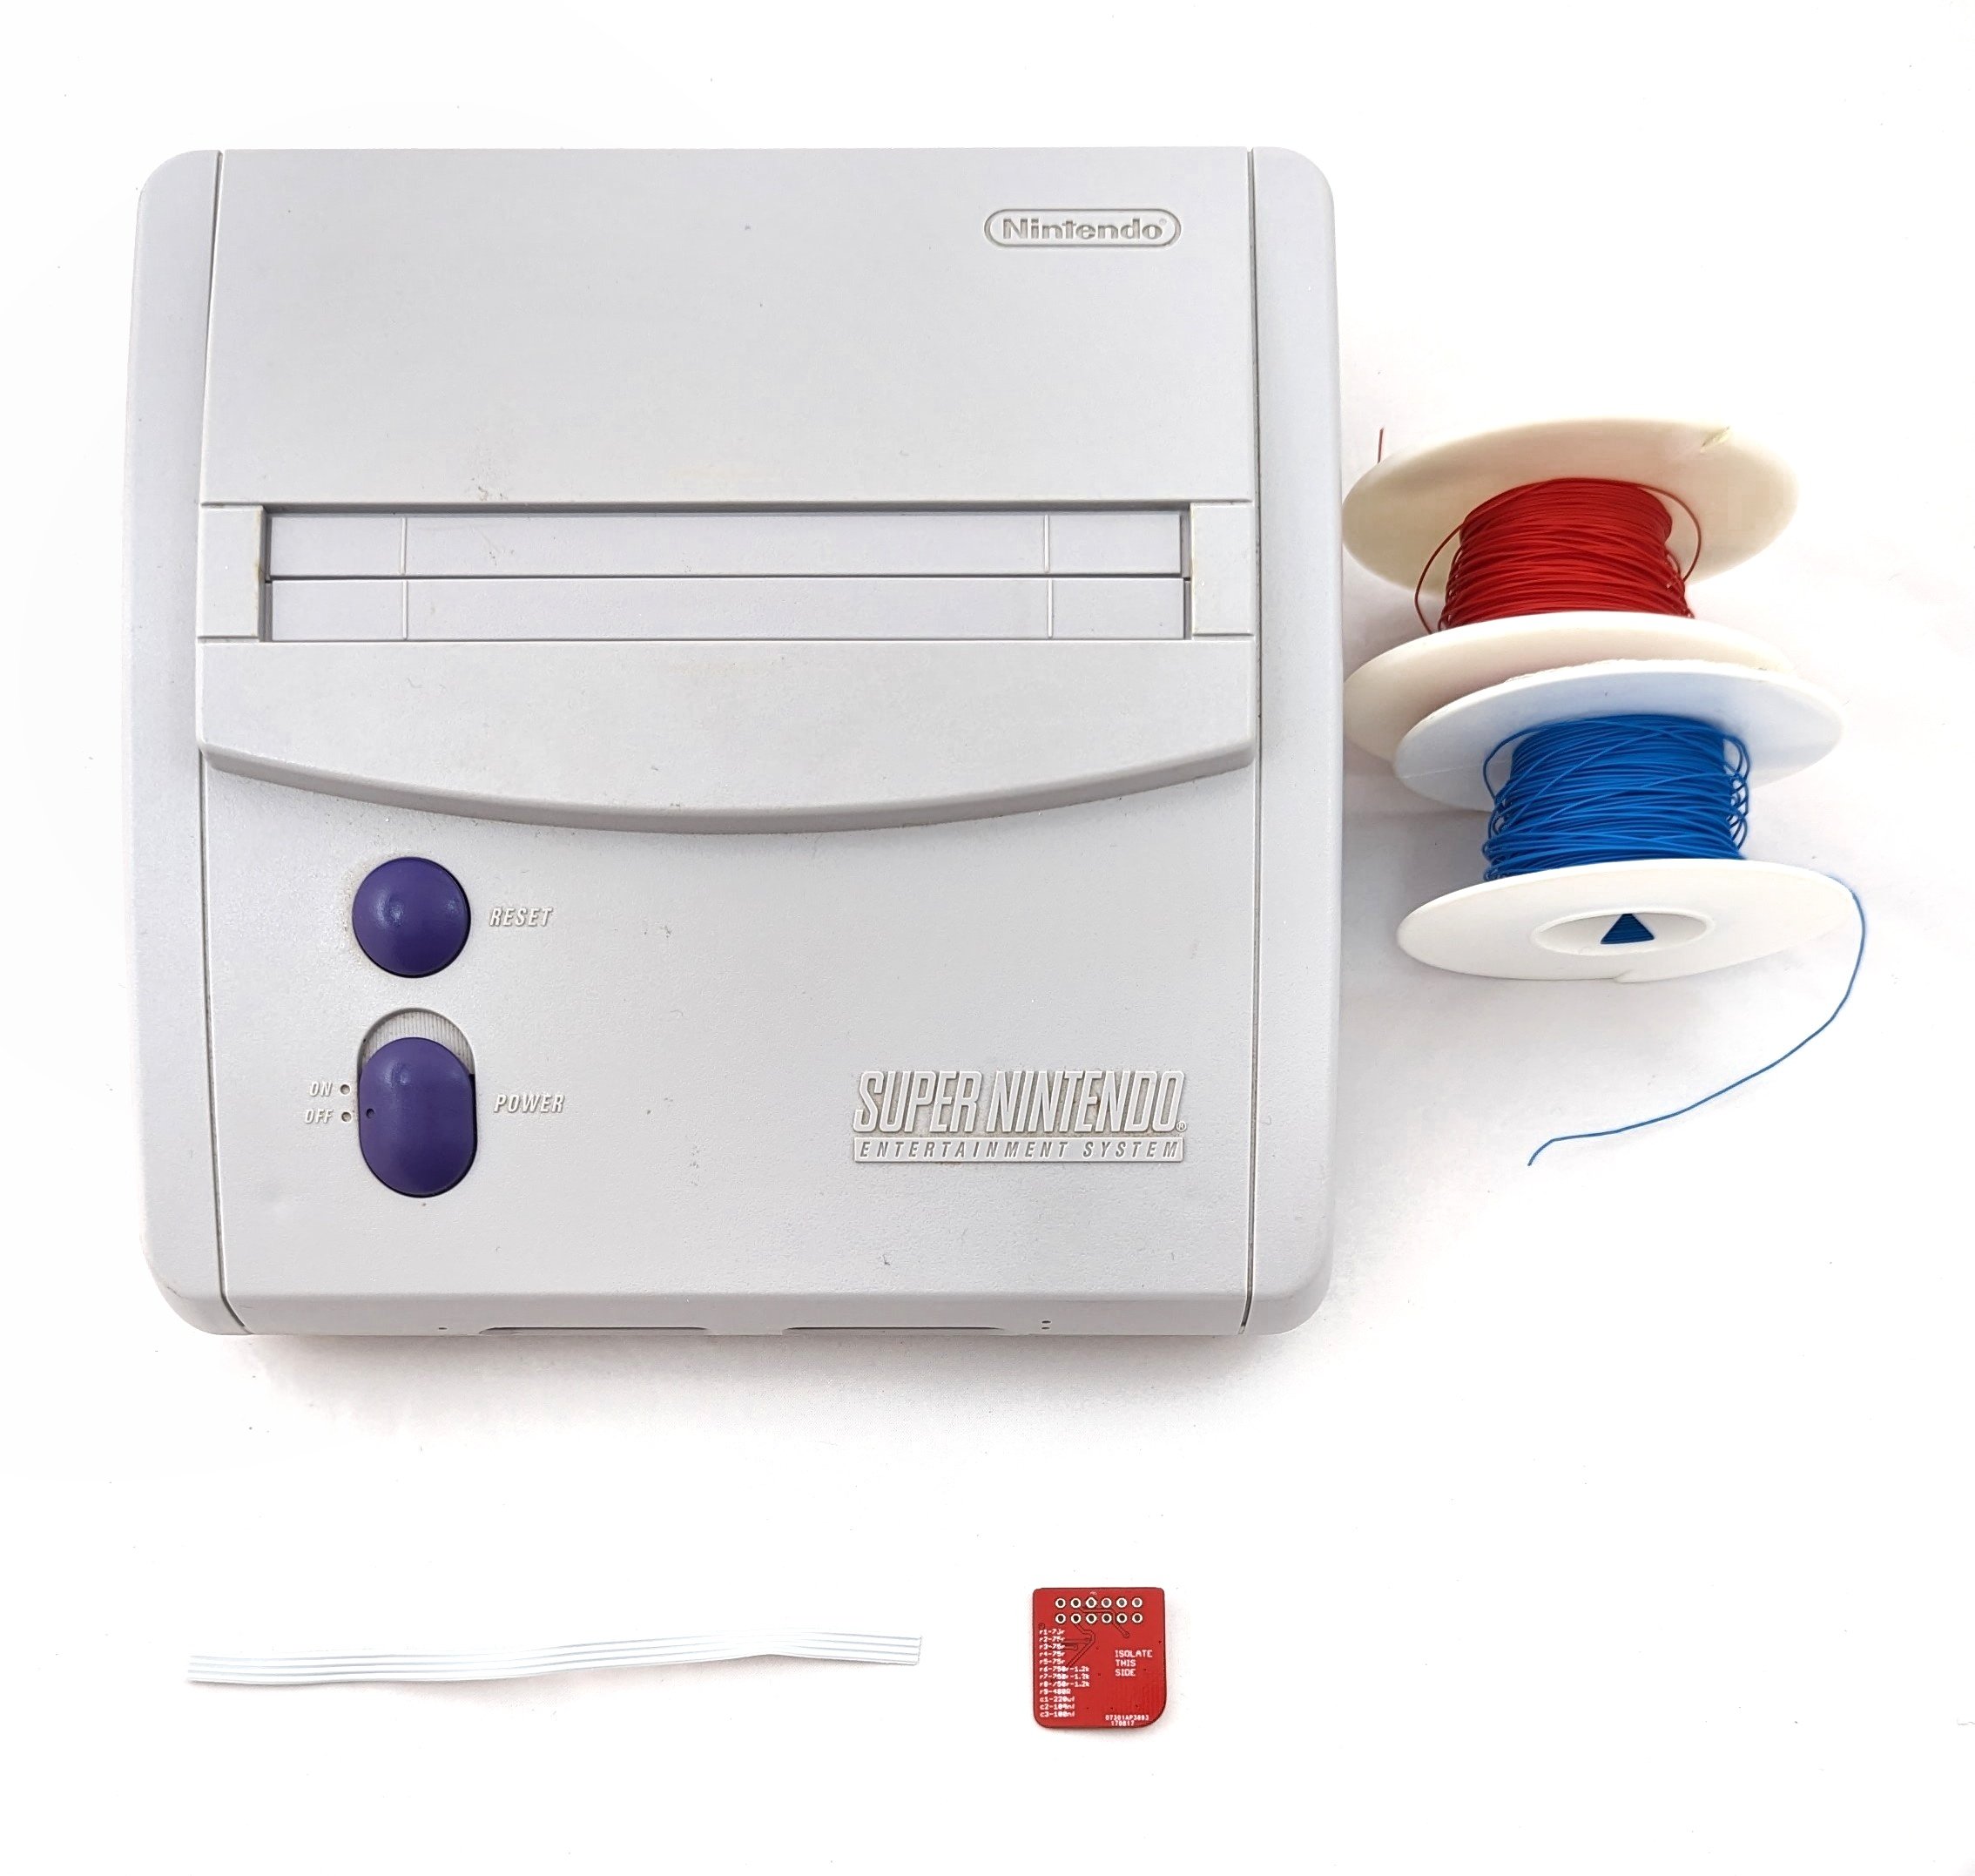
Step 1: Disassemble the SNES
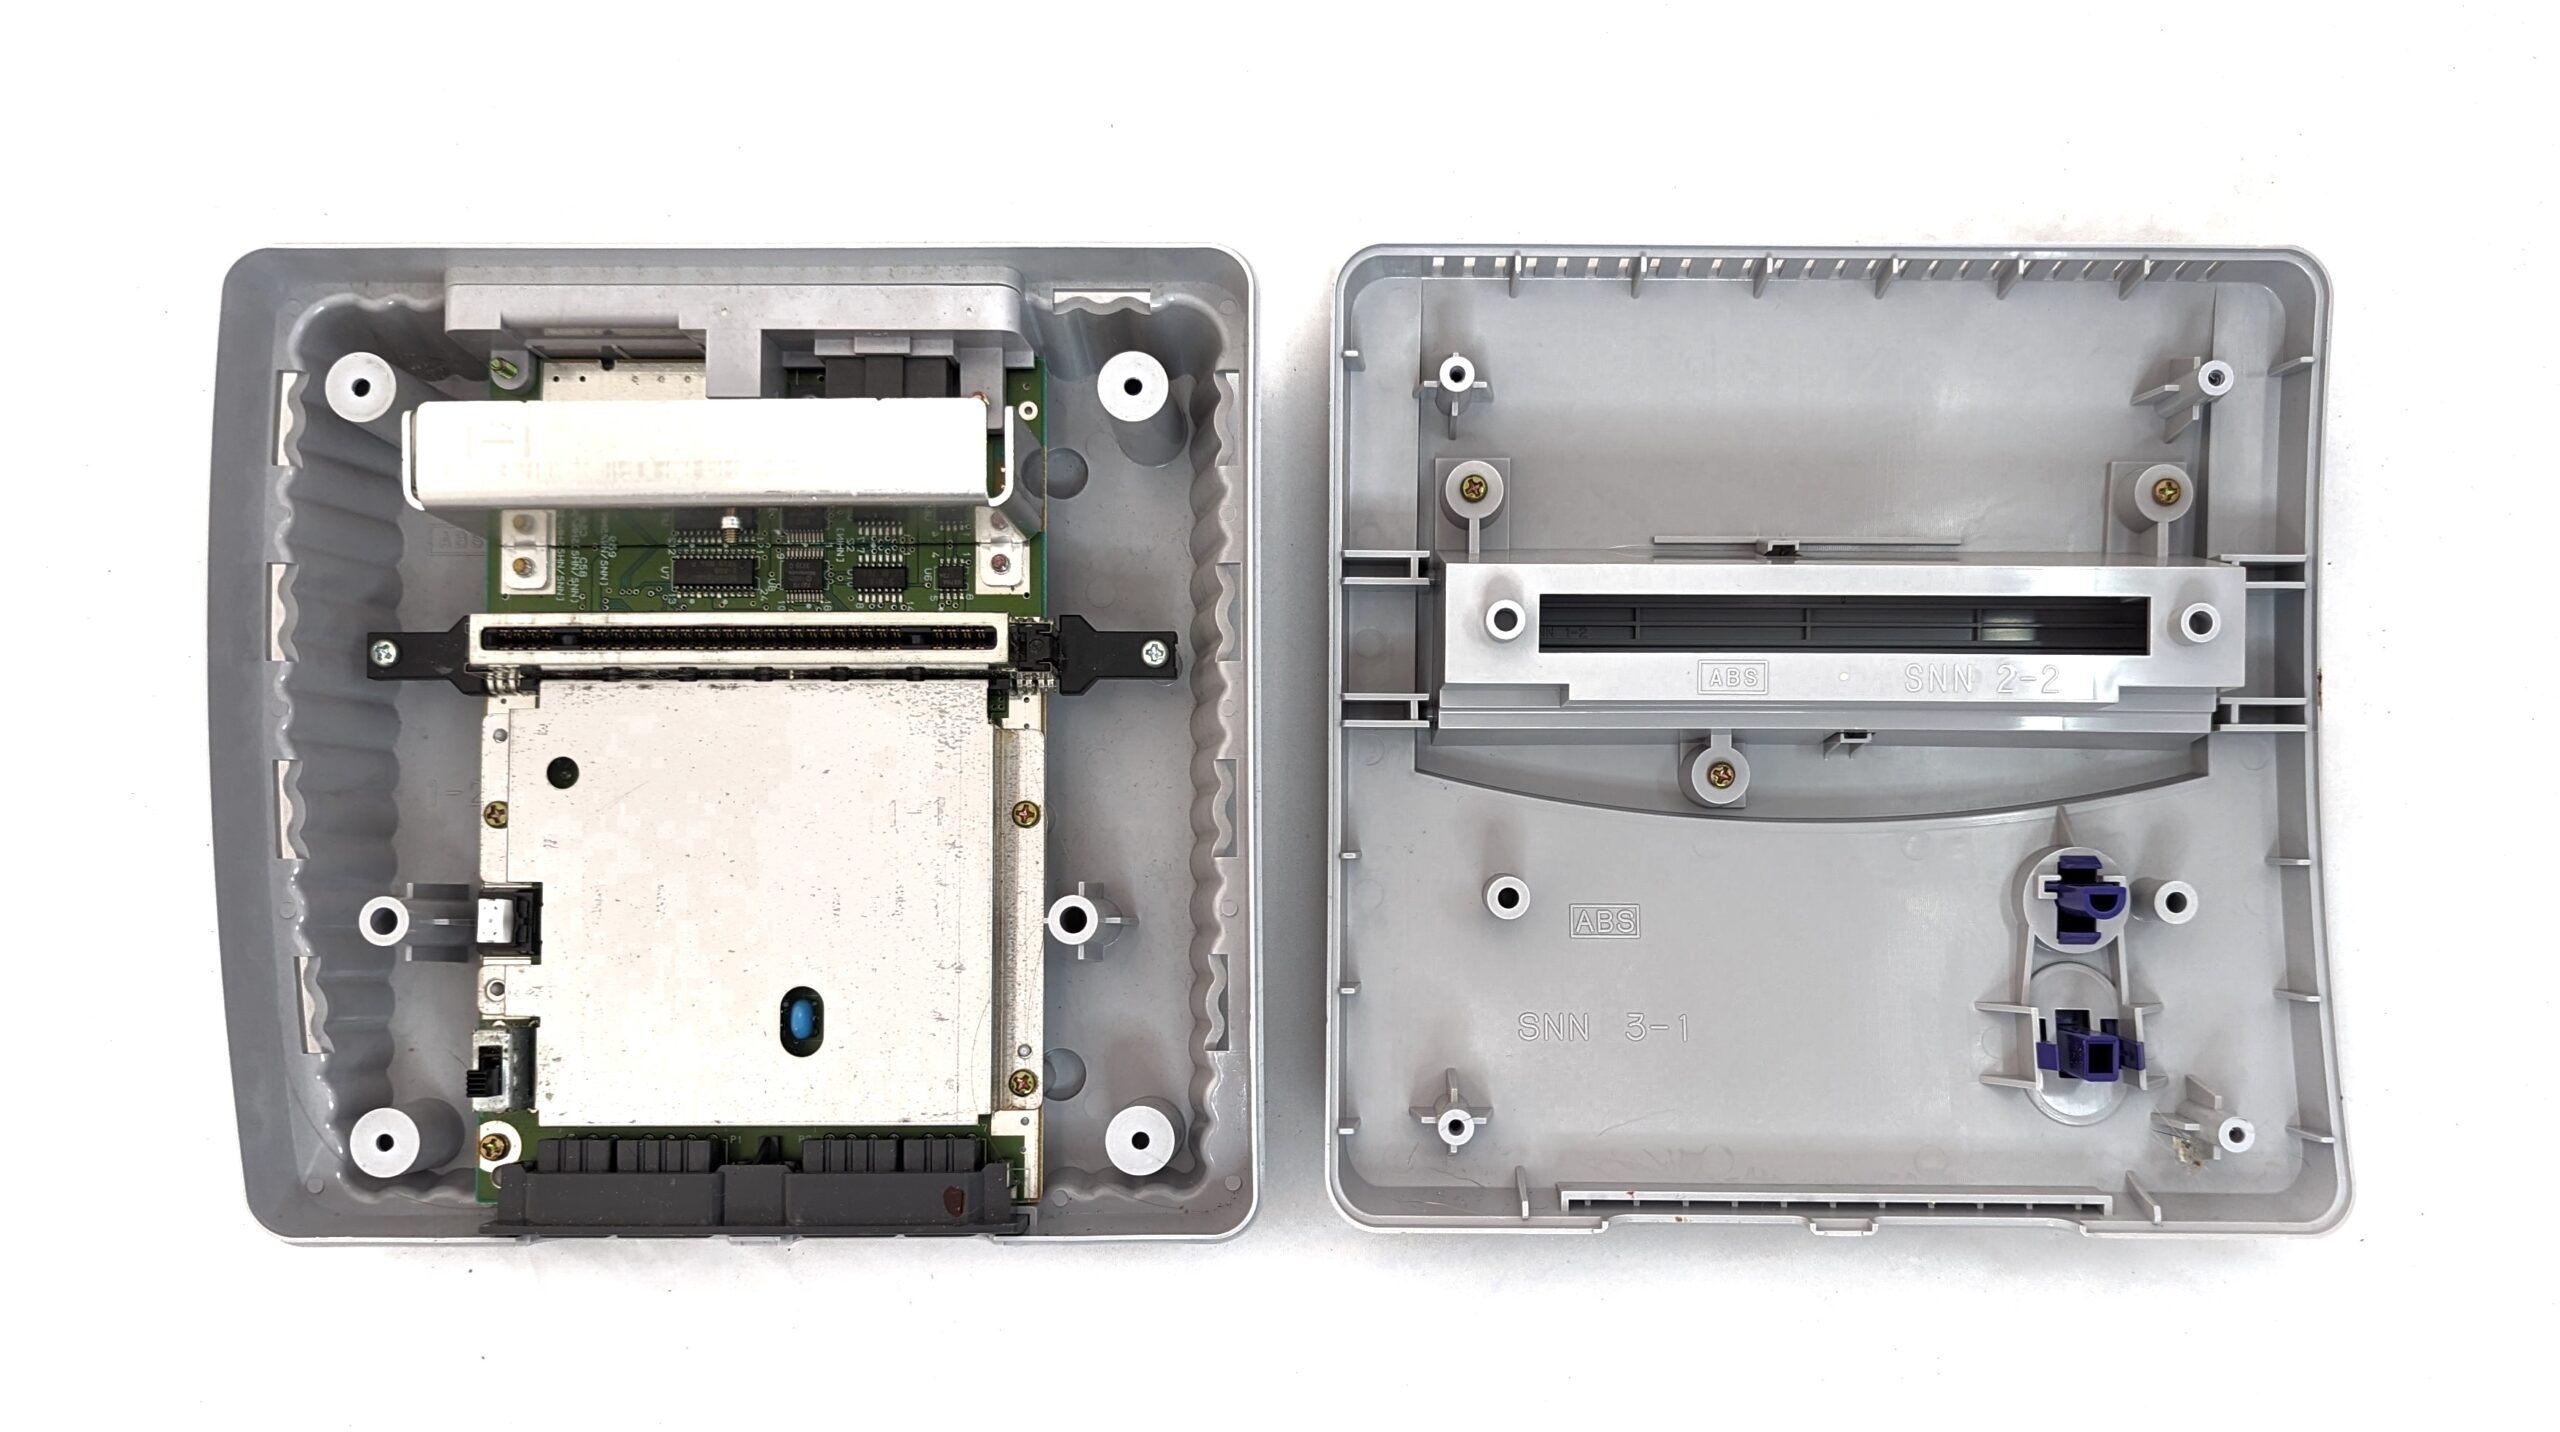
As with most mods, we begin by disassembling the SNES. Using a 4.5mm Security Bit screwdriver, take out the four screws at the bottom of the console. The plastic case should then lift out without any resistance.
Now that you have the console open, you can access the SNES’s PCB and continue disassembly. There are seven Phillips Head screws here: the three large silver screws secure the cartridge slot and the Multi Out port while the other four secure the PCB to the top of the case. Remove them all and extract the PCB.
 |
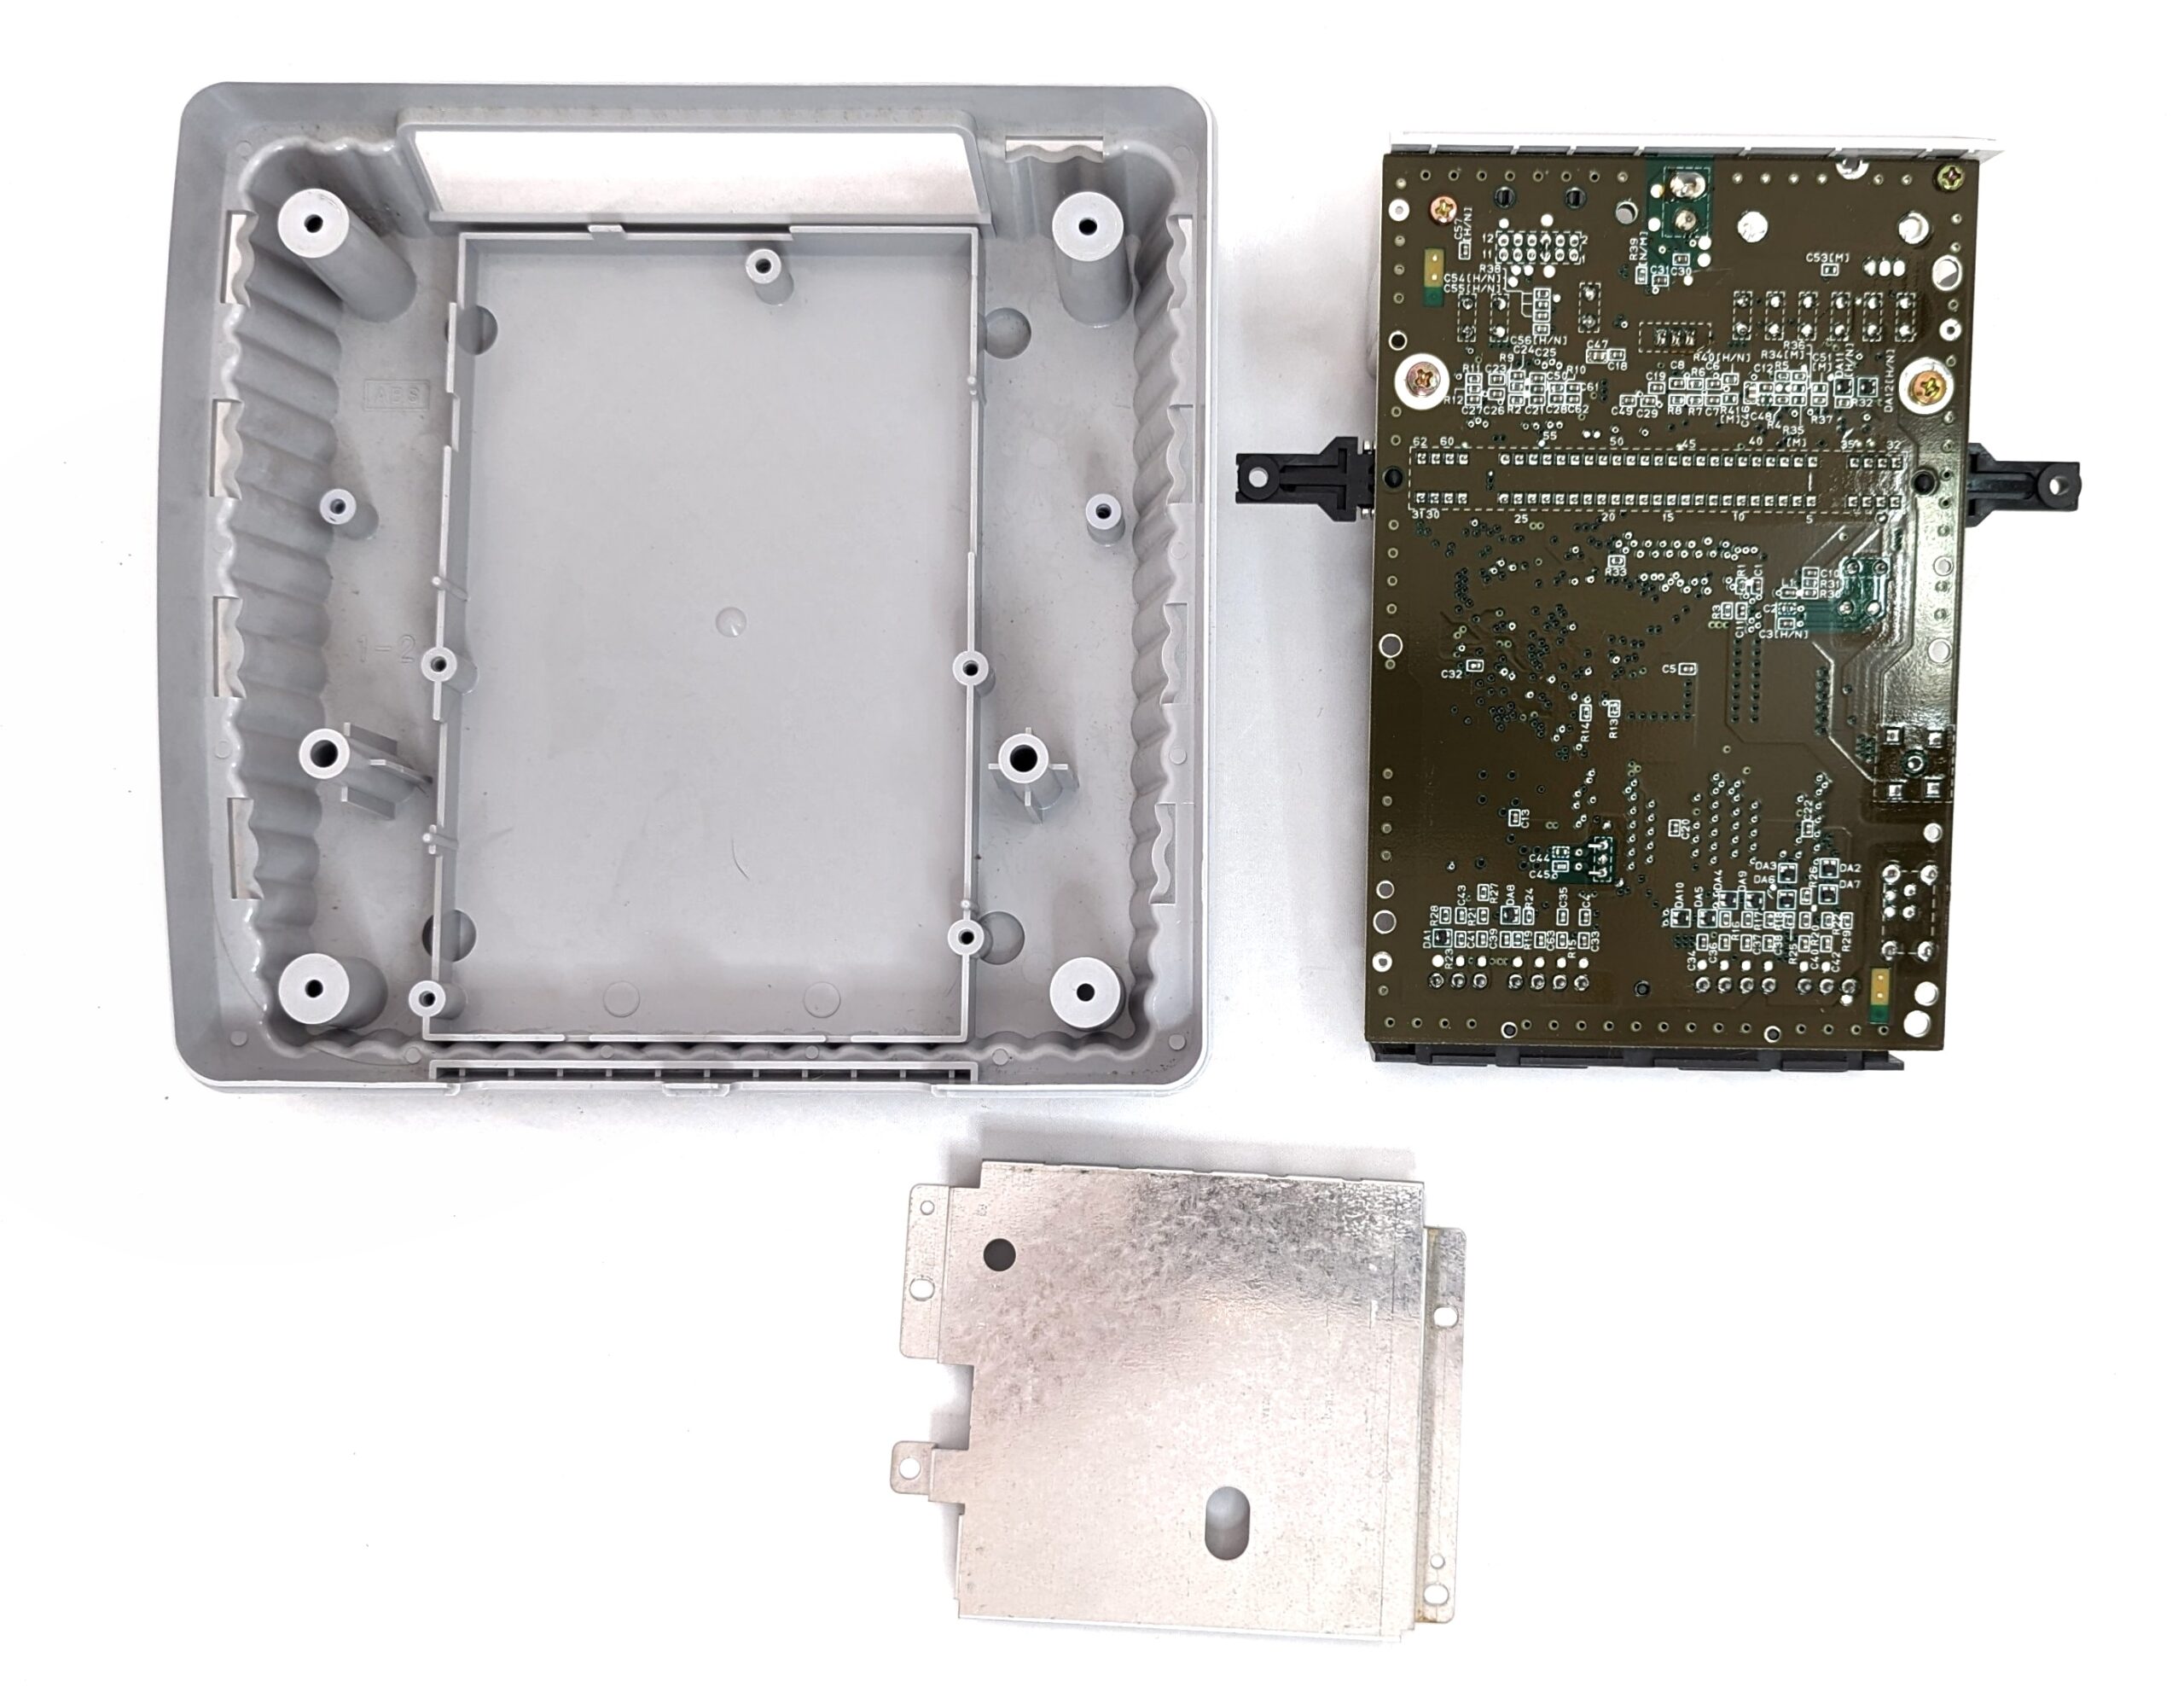 |
| Removing the lid of the SNES | Extracting the main PCB from the bottom half of the plastic shell |
Note: we highly recommend placing the screws in a small container, organised by size and placement, to keep from losing them!
Step 2: Clean the SNES
Depending on how the SNES has been stored, it may be worthwhile to take some time to clean out the dust, bugs, and detritus lurking inside. We skipped this step in our build because our SNES was relatively clean.
If cleaning is necessary, use a cotton swab dipped in rubbing alcohol to carefully clean the PCB. You can also use compressed air to blow dust and debris away. If you are feeling particularly industrious, you can also clean the plastic of the SNES using Retrofixes’ online guide—this is for aesthetic purposes online, however, and will not affect the functionality of the mod.
Step 3: Prepare the PCB for Installation
Now that the PCB is clean we can prepare it for the mod installation. Identify the areas of the board that you will be soldering to (circled below). At the top, there should be a dozen pins organised into two rows. Near the middle, there will be four holes that you will connect to the R, G, B, and CS slots on the amplifier using the wires included in the mod kit.
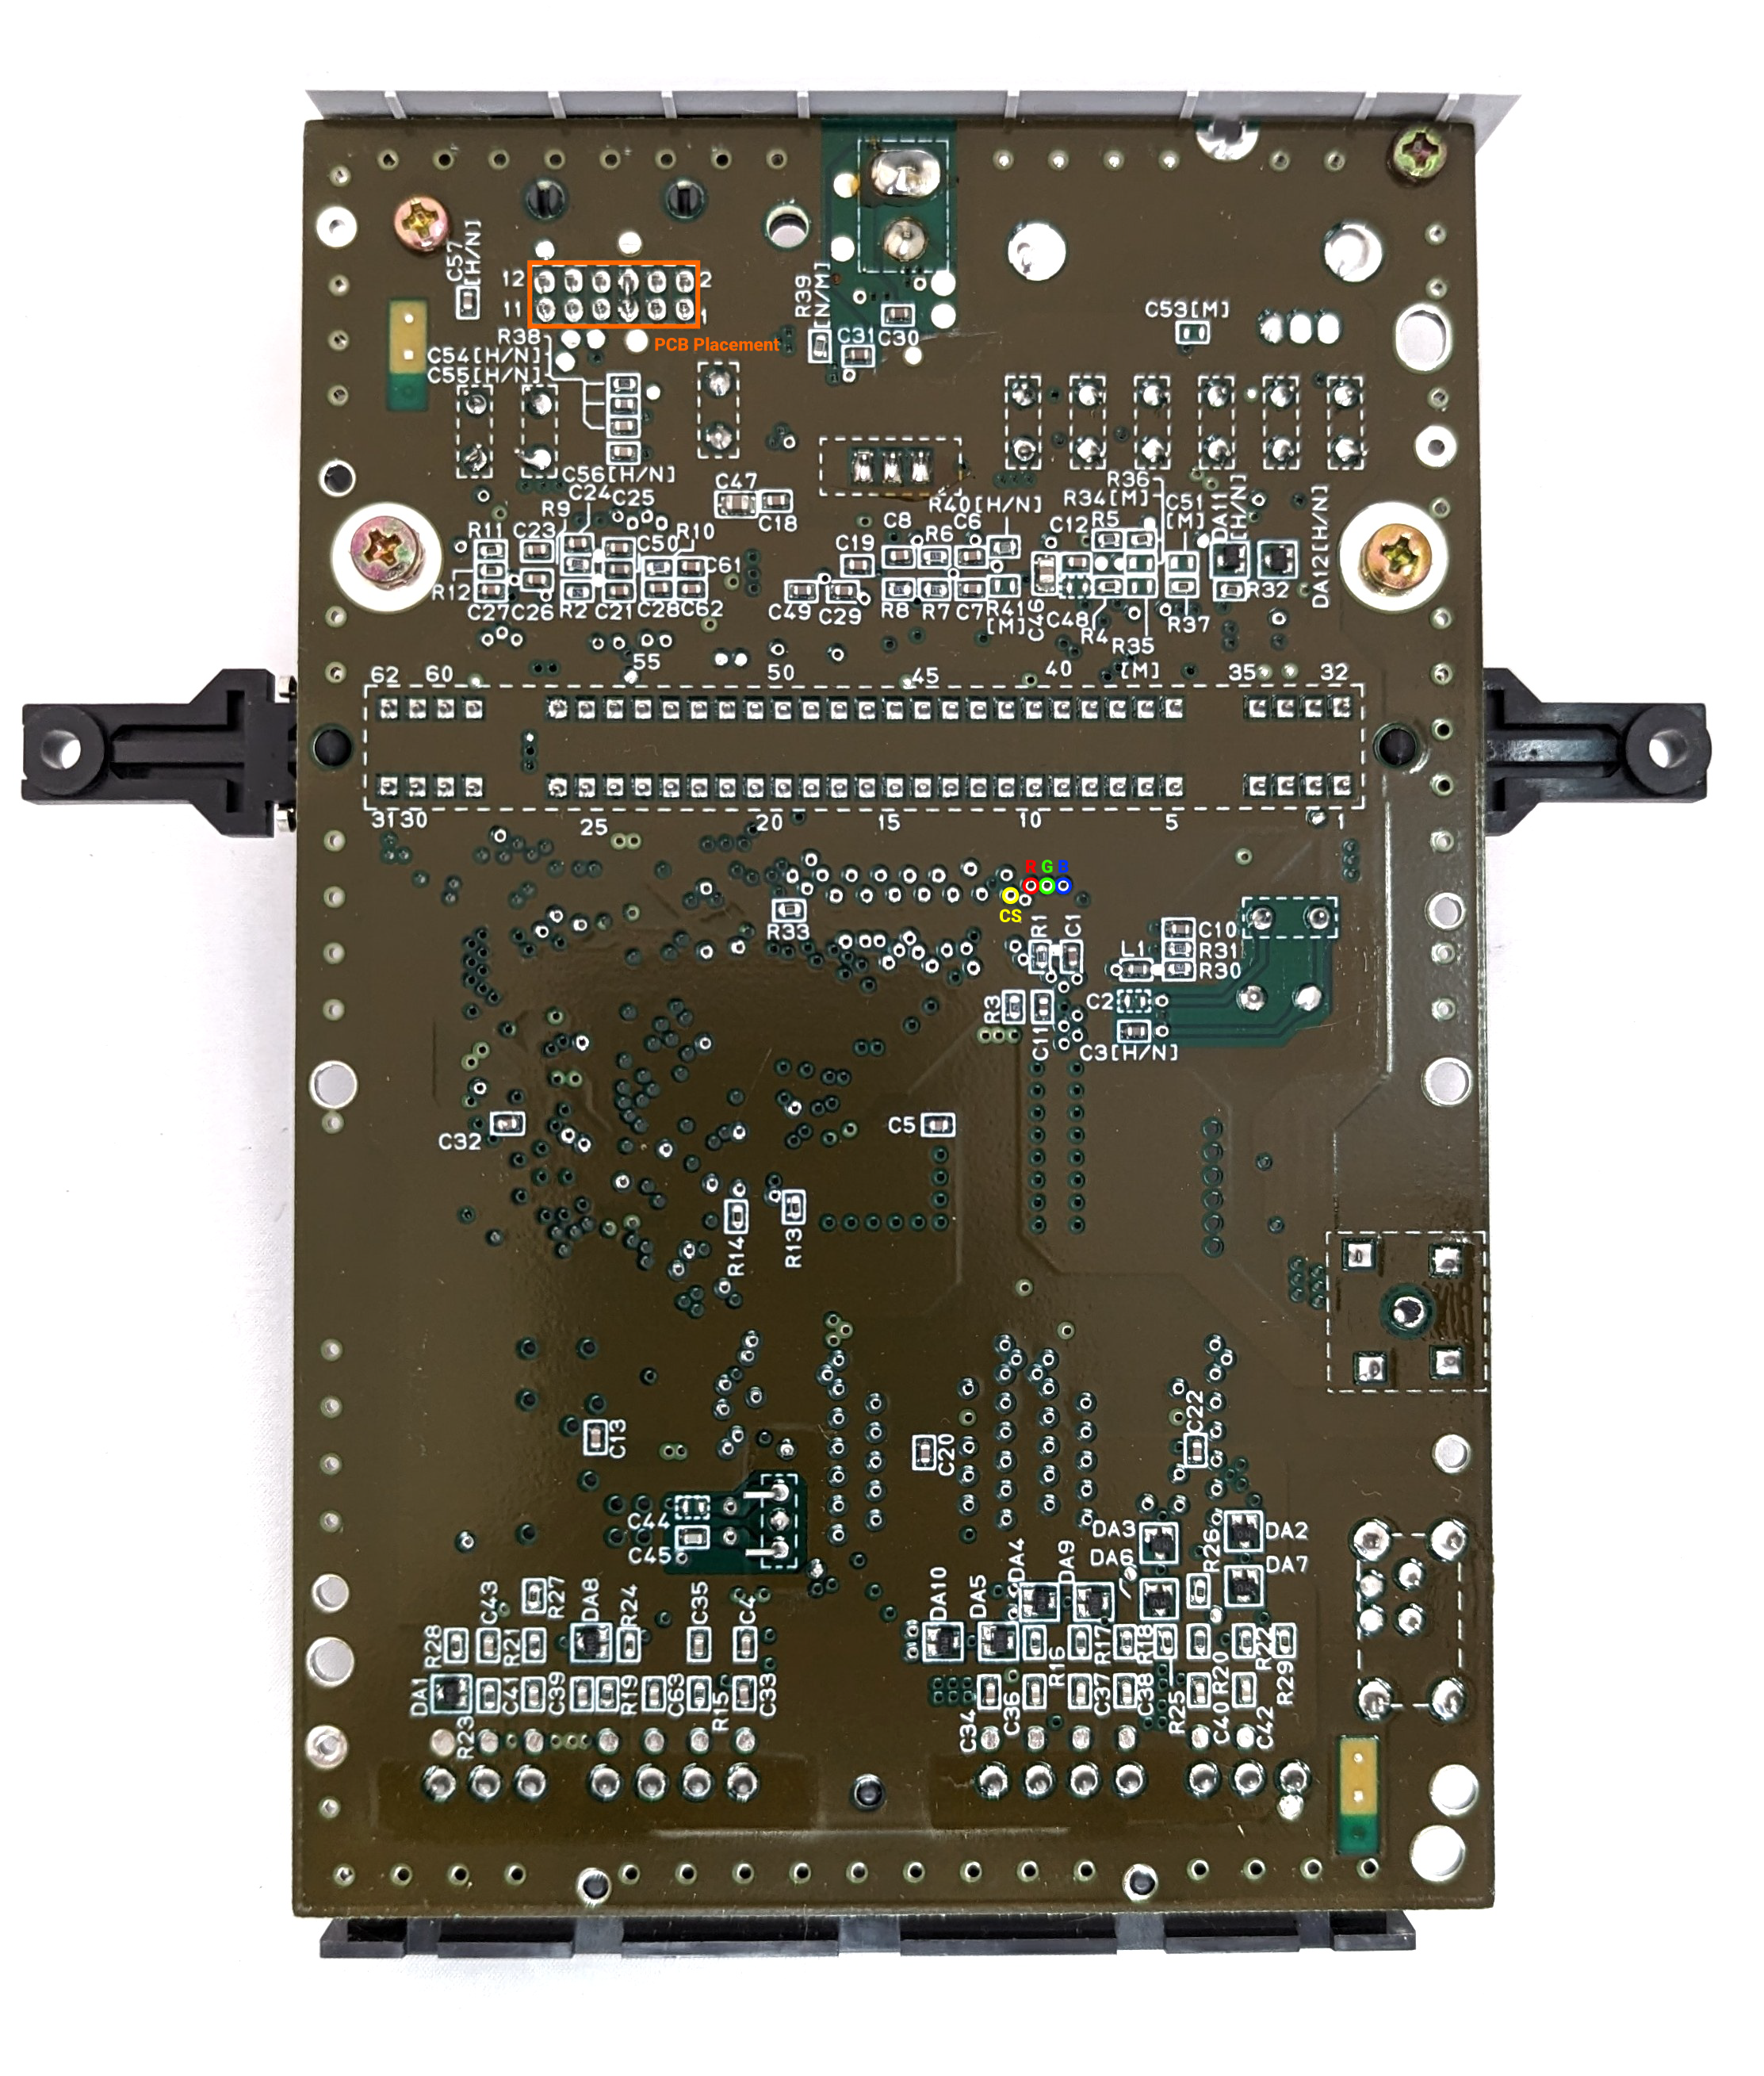
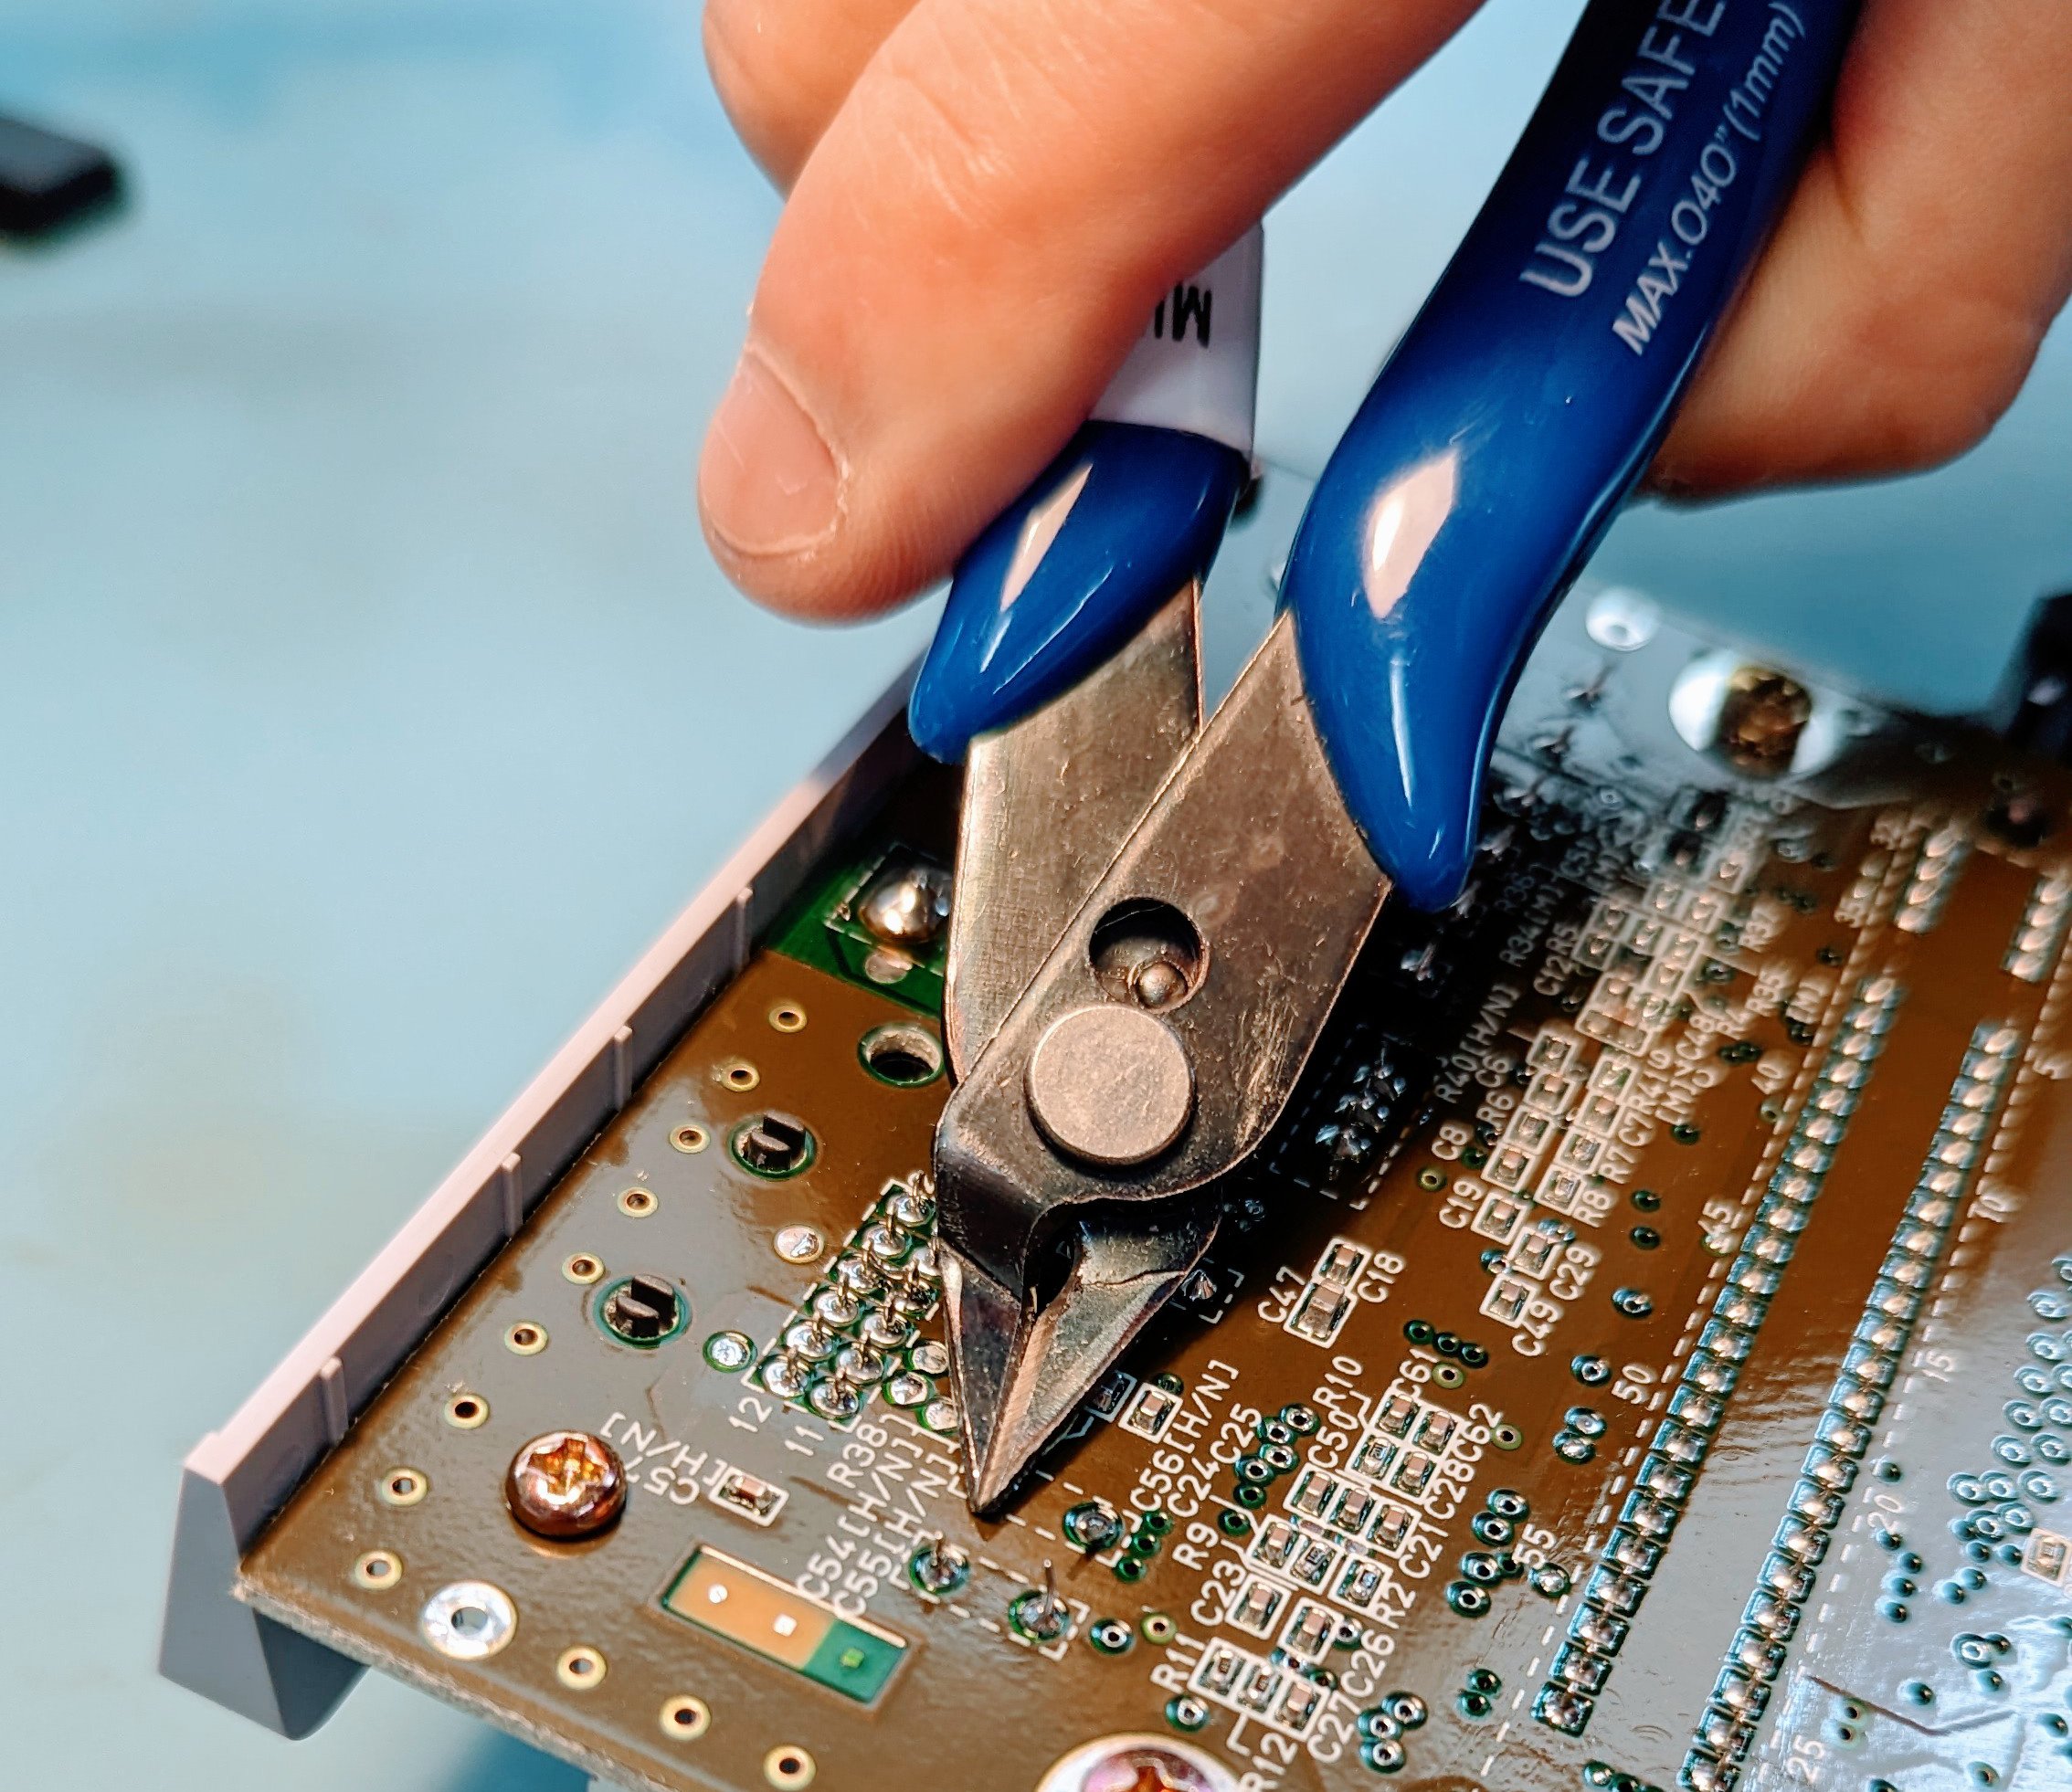
If you try to place the amplifier onto the console right now, you’ll notice that there are two things in the way: two pins jutting out from the board and (potentially) a glob of solder that bridges two of the dozen top pins. Remove the two pins using a pair of flush cutters. Extract the solder bridging the pins using a soldering iron and either a solder pump or a soldering wick.
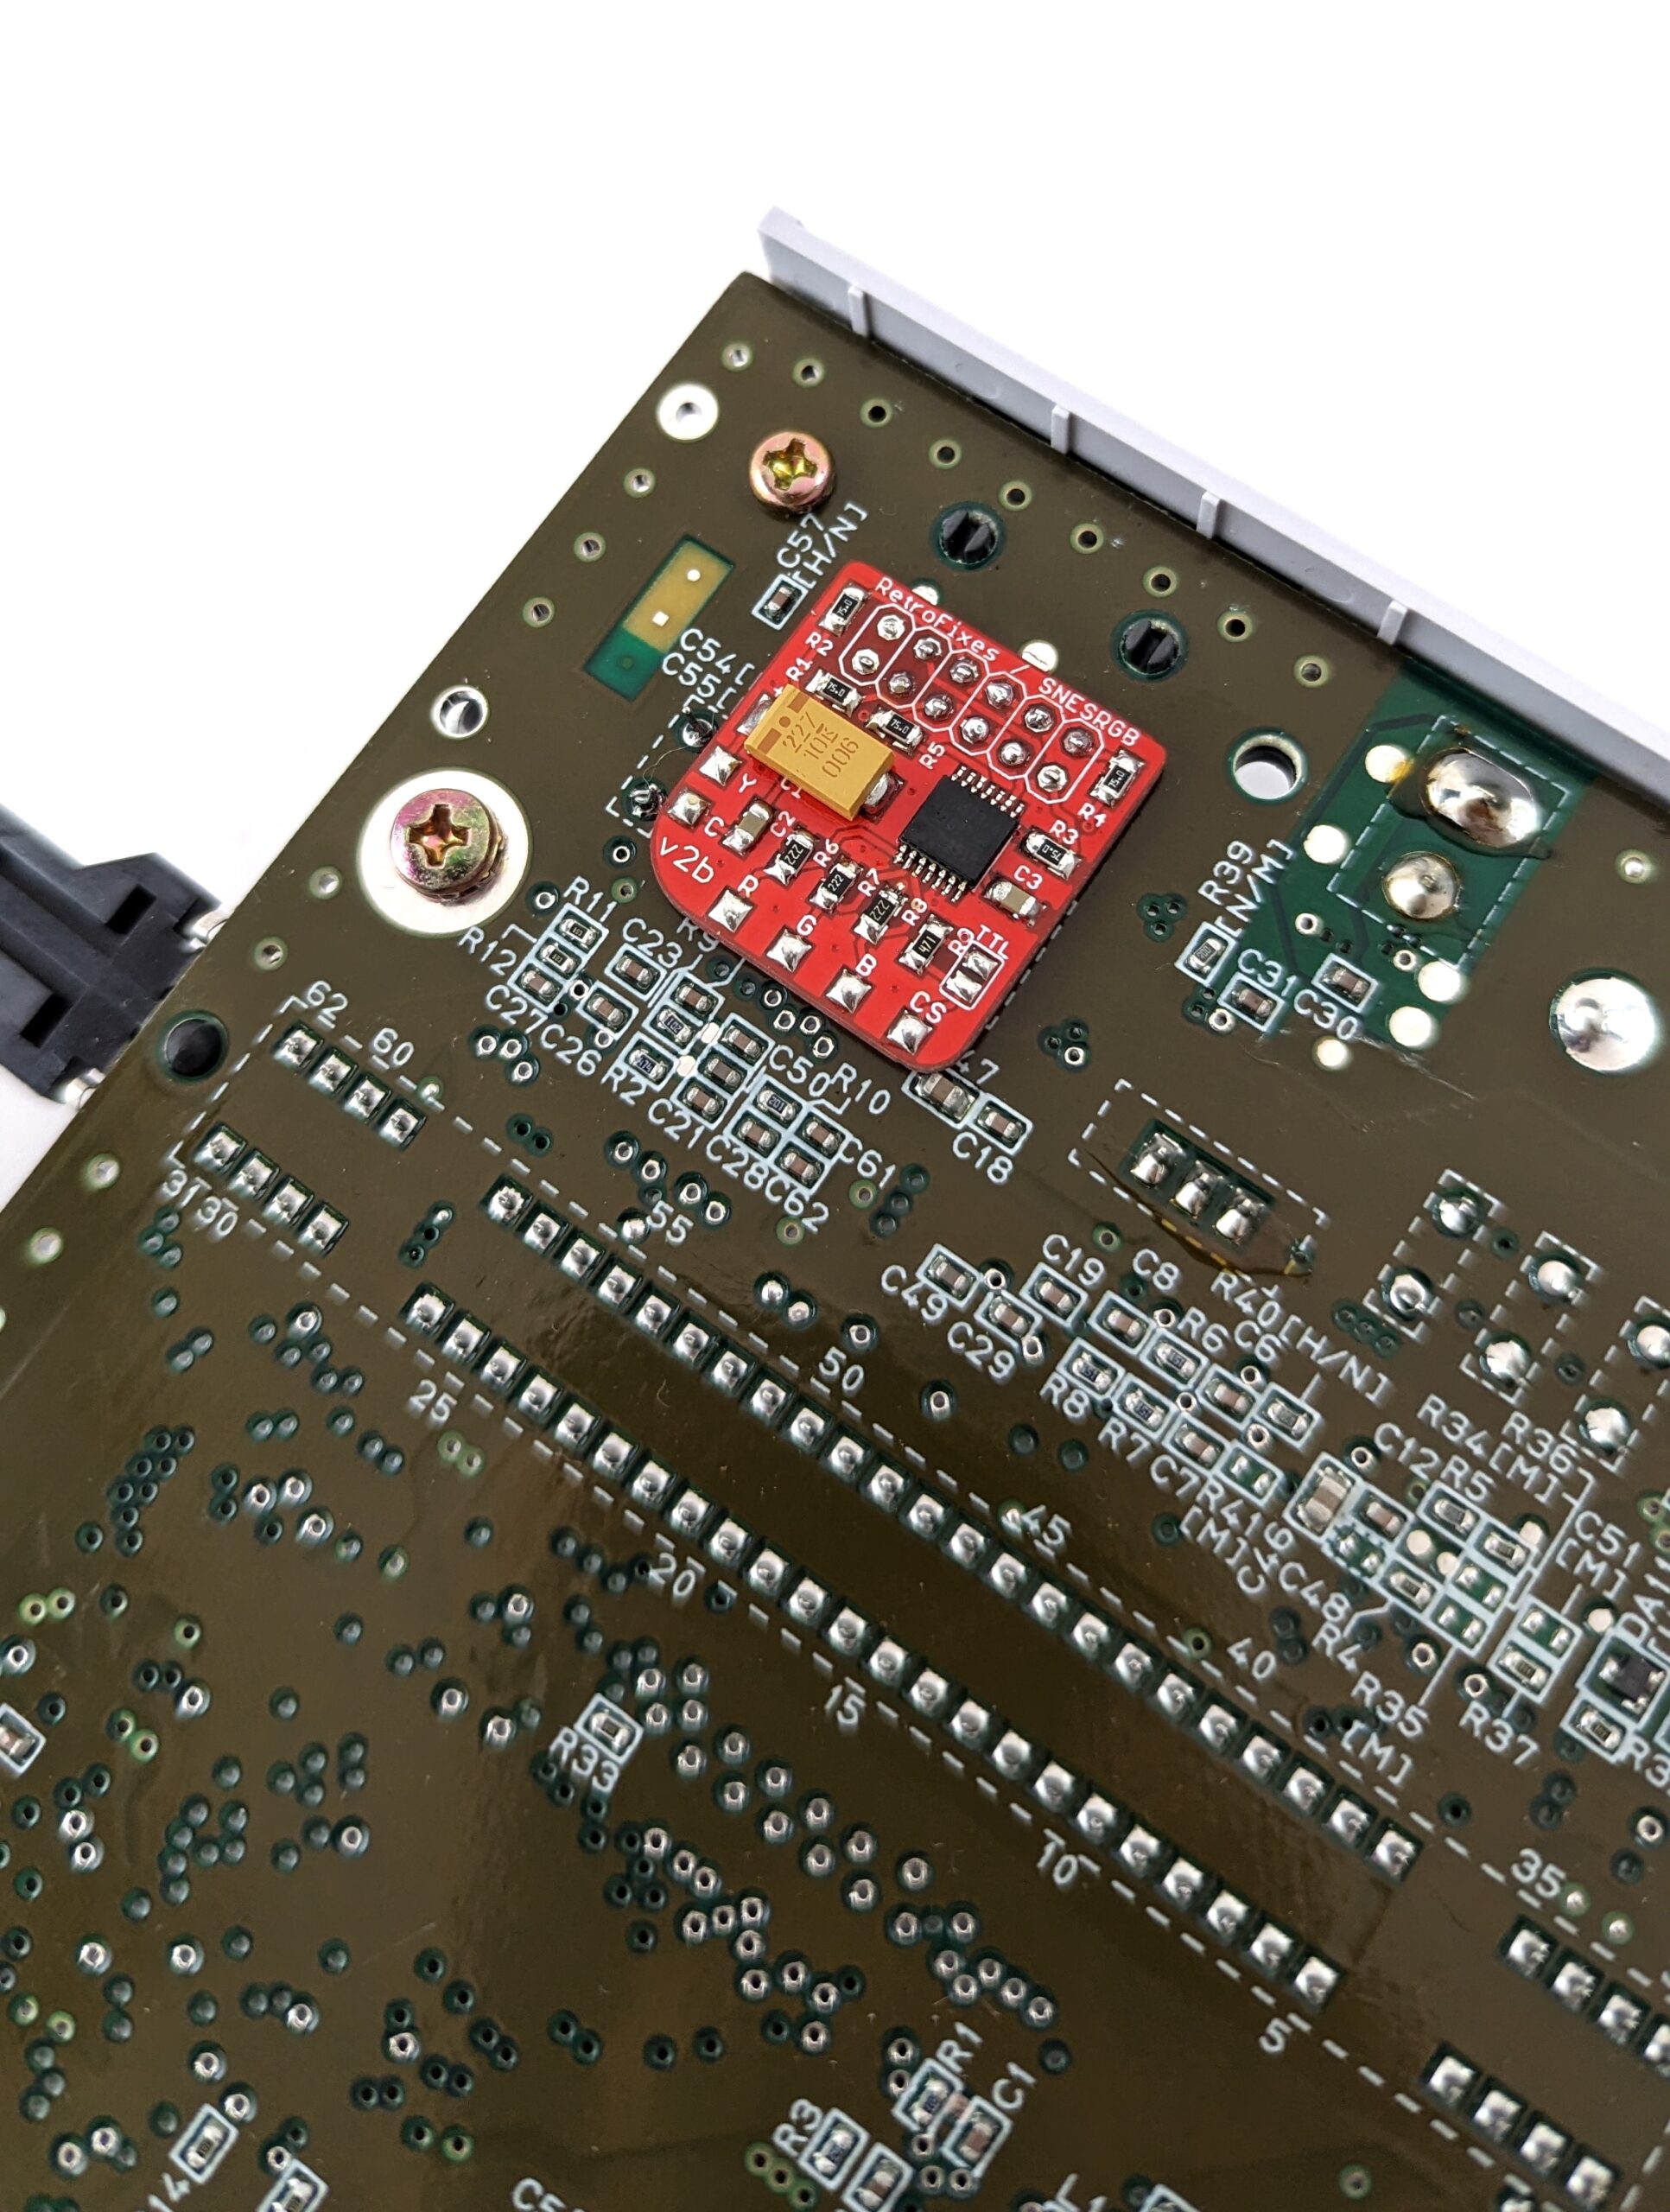
Once complete, place the amplifier on top of the PCB so the dozen pins are nested in their slots. It should be relatively flush with the PCB with little-to-no movement.
Note: You should put Kapton tape on the bottom side of the amplifier (avoiding any holes) in order to better insulate it from the PCB.
Step 4: Solder the 12 Pins
The 12 holes at the top of the amplifier match to the 12 pins we have identified on the PCB, which are mapped to the 12 pins on the SNES’s Multi-Out port. Our first task is soldering the amplifier to these 12 pins.
In sequence, solder each of the 12 points to bind the existing pins to the holes on the amplifier. Be sure not to bridge any of the connections! When you are done, the amplifier should be securely affixed to the PCB.
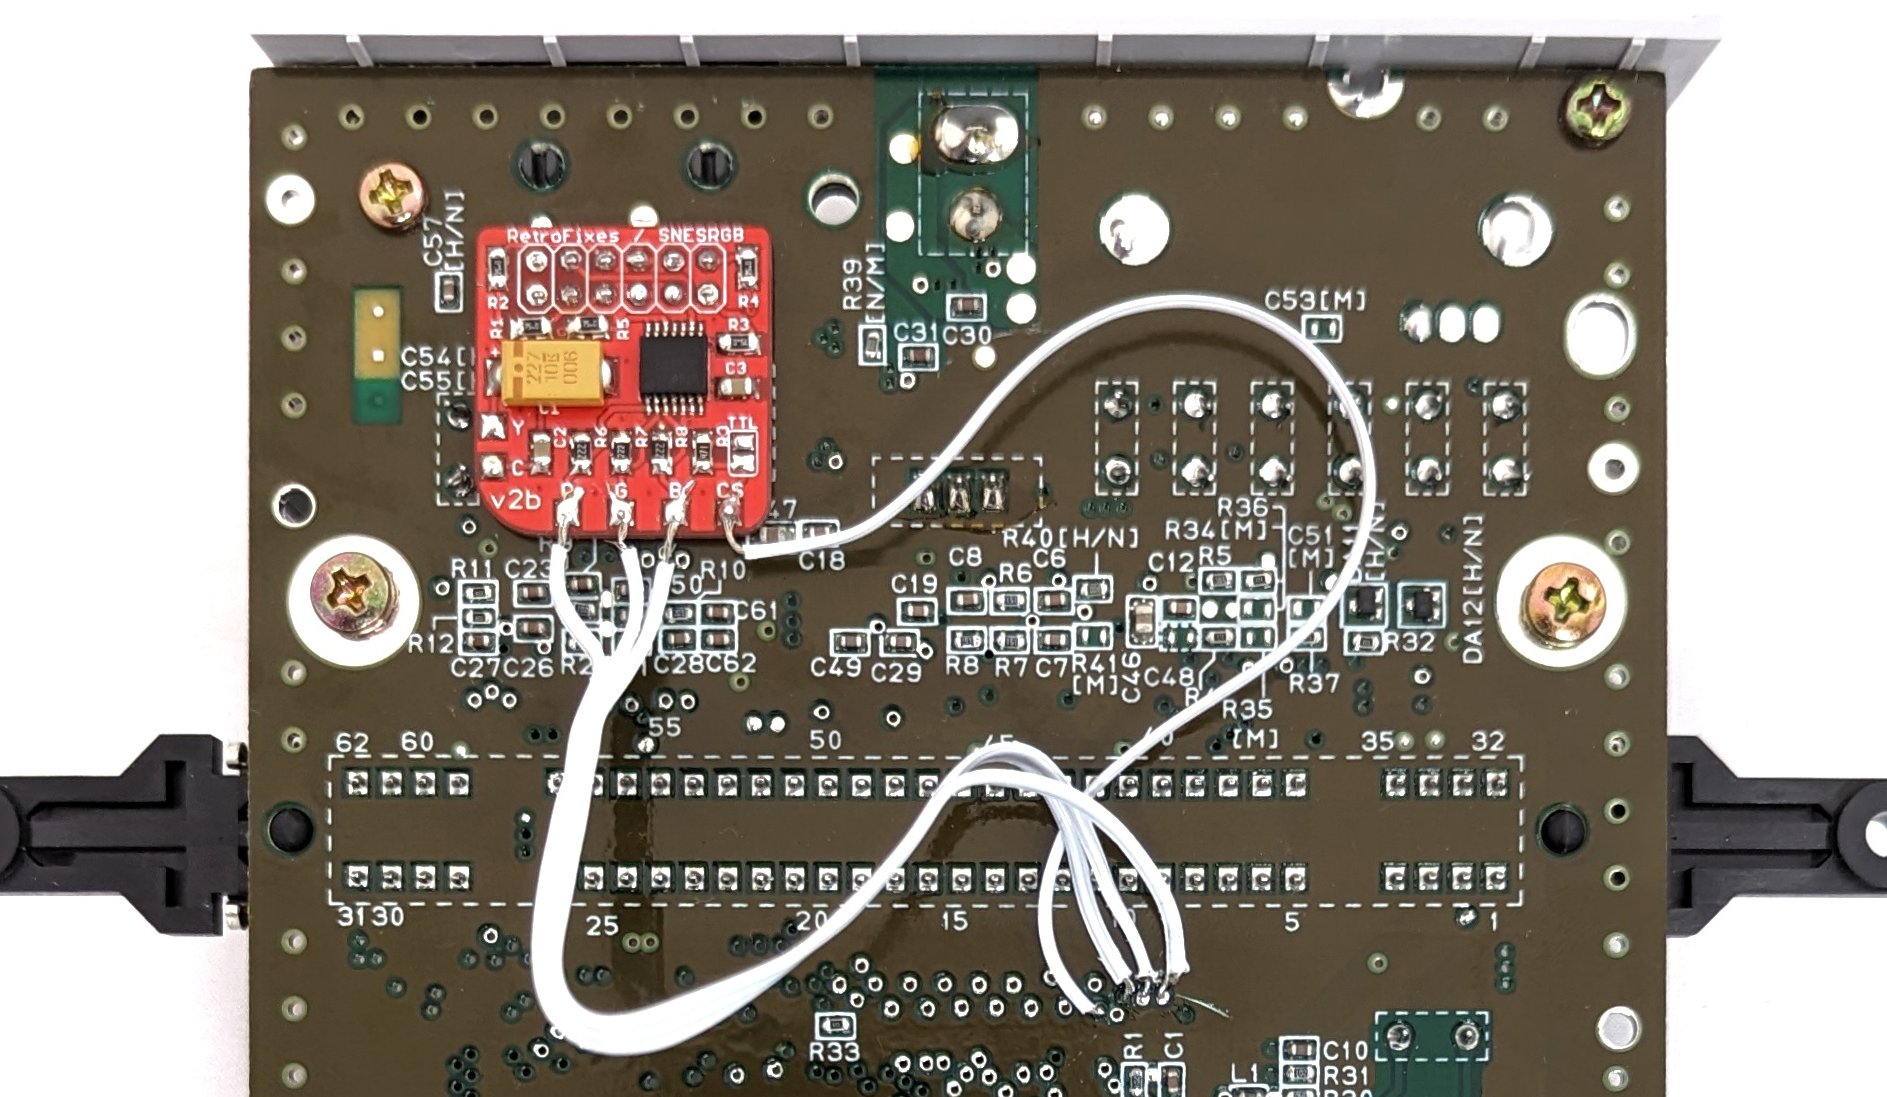
Step 5: Solder the R, G, B, and CS Wires
Next, you need to connect the amplifier to the Red, Green, Blue, and CSync pads that we previously identified. The mod kit provides you with wire—several strands of white wire bound together—but feel free to use any light gauge wire you would like. To prepare the wire for soldering: separate the wire strands, strip a few millimetres of the end, and then “tin” the tips with solder.
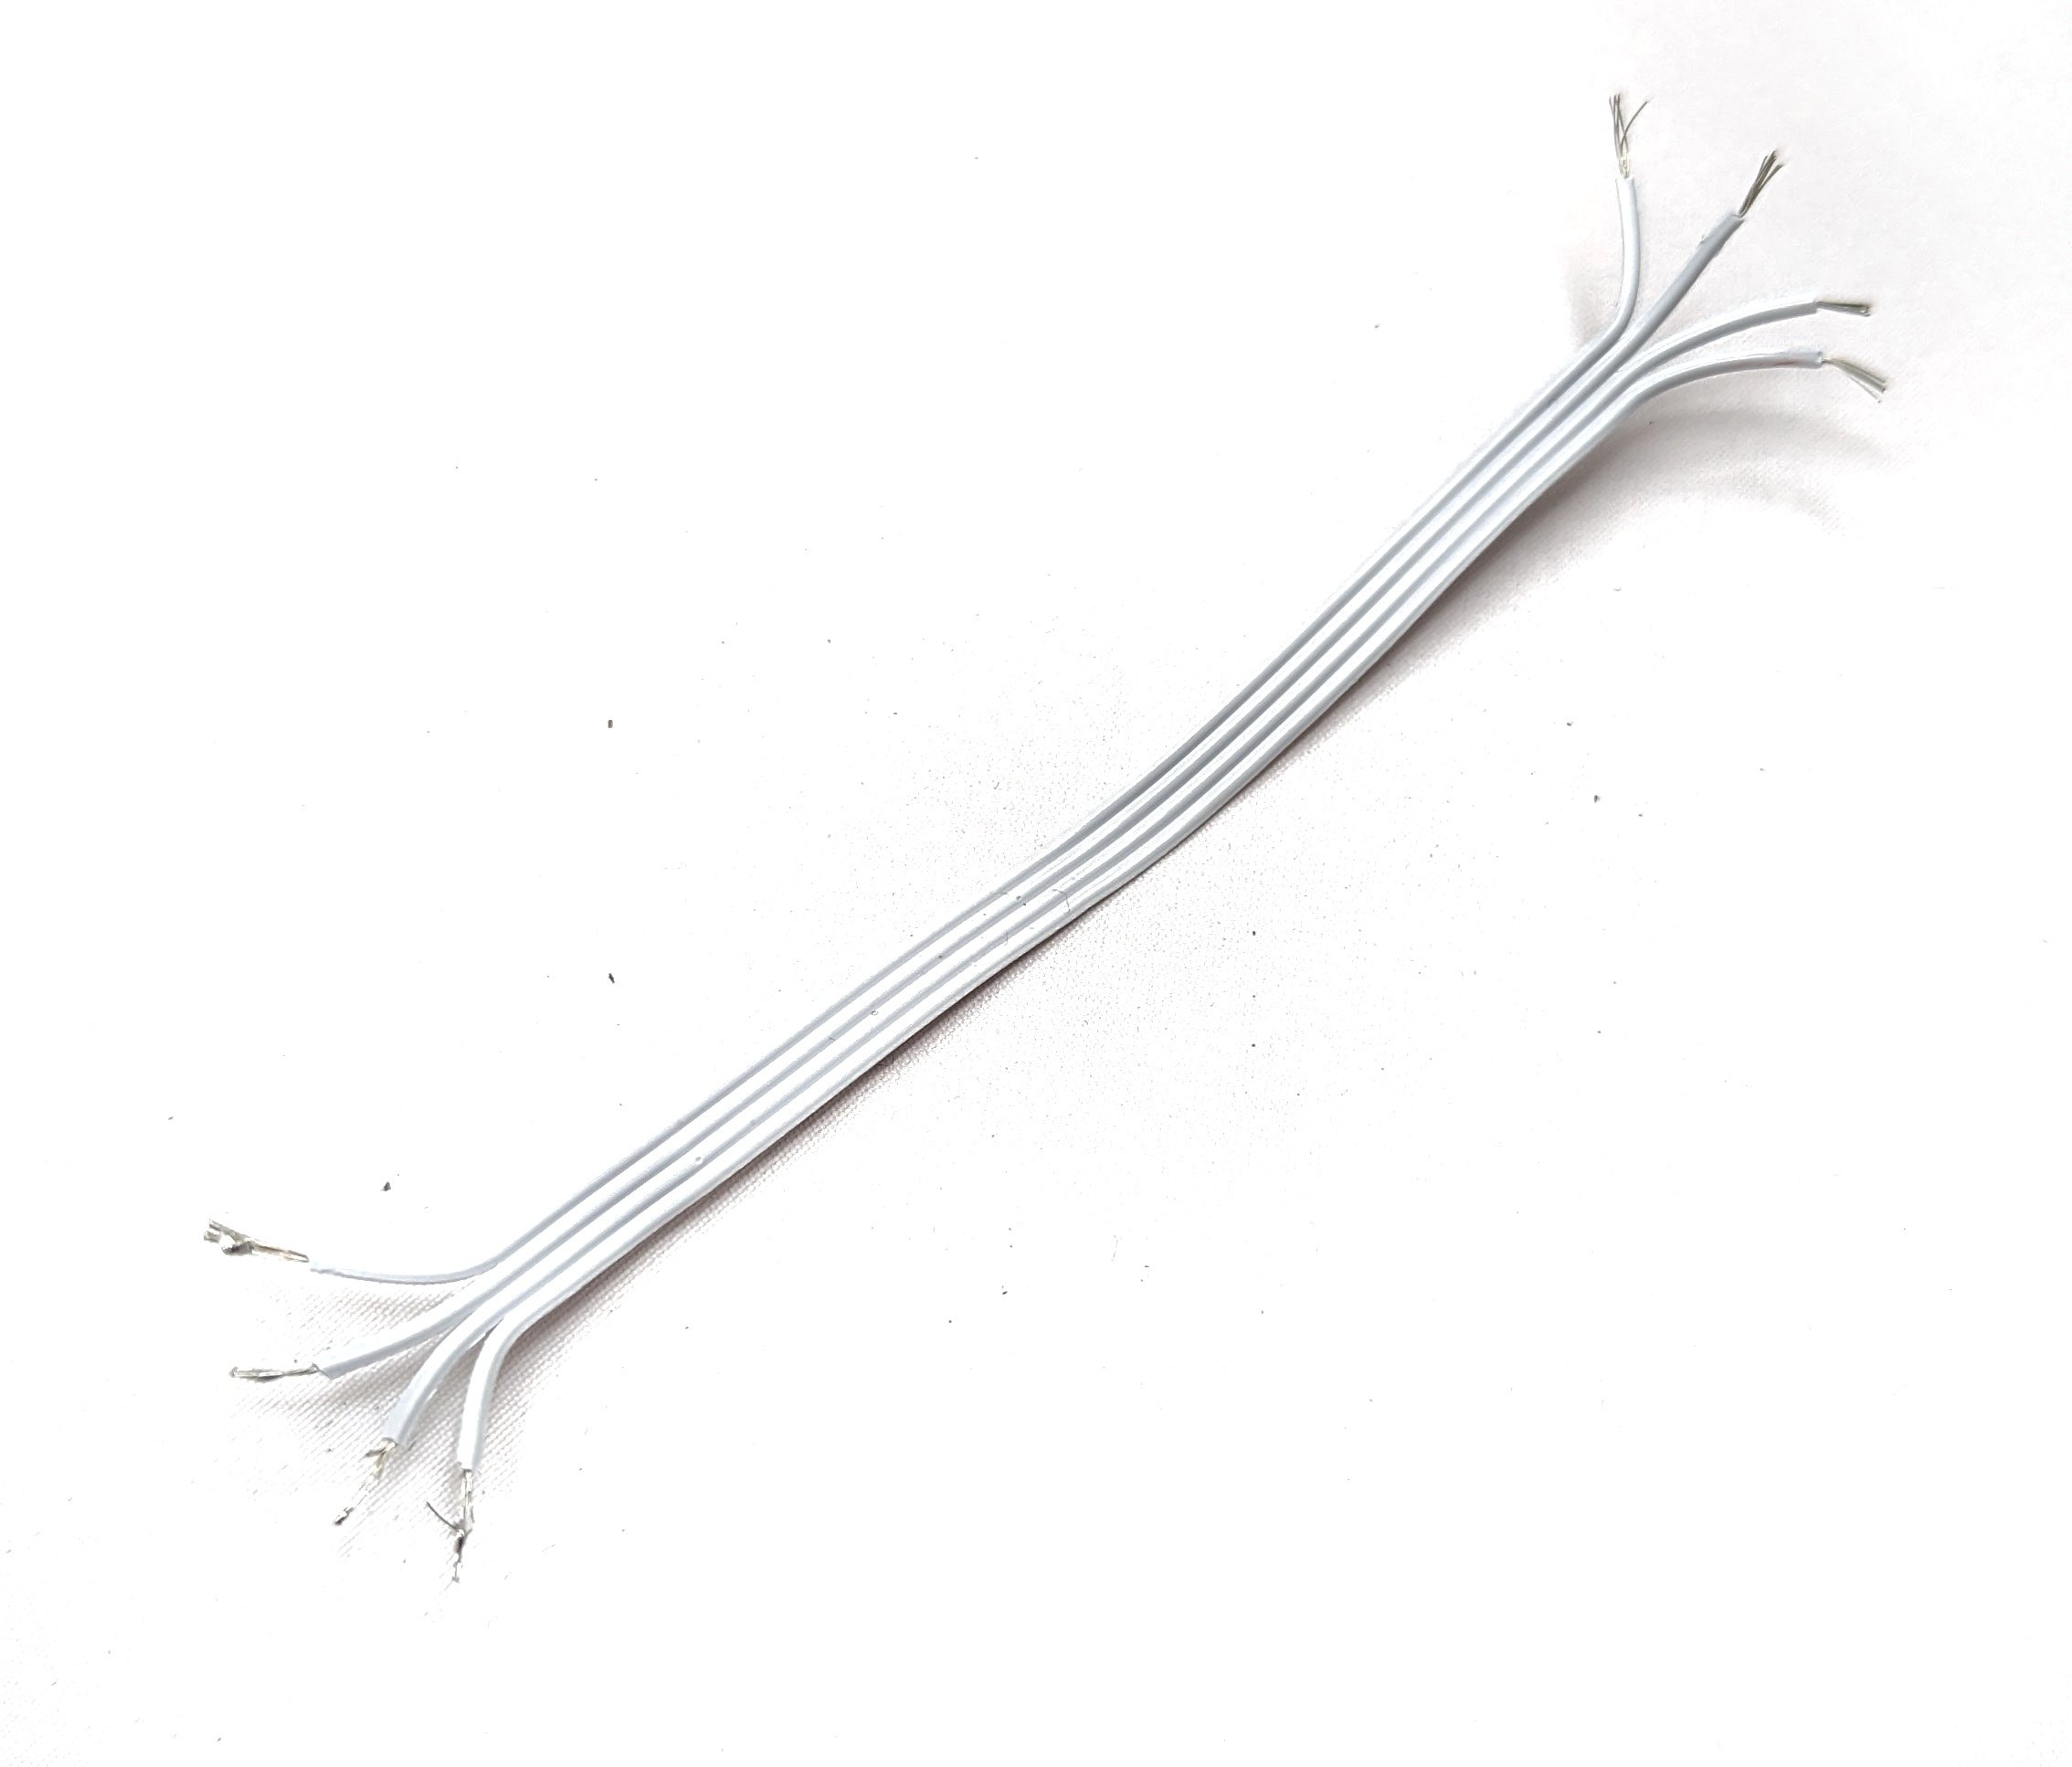
Once the wires are ready, solder them to the pads on the SNES’s PCB. At this point, it doesn’t matter which wire goes where, but make sure that they are securely affixed and are easy to identify. If the solder is not easily sticking to the PCB, soldering flux may be helpful.
Solder the other end of the wires to their matching pads on the amplifier, which are clearly labelled R (Red), G (Green), B (Blue), and CS (csync). Double check to make sure they are in the right position! This soldering should be straightforward as the amplifier is shipped with small globs of solder on each pad.
Step 6 (Optional): Solder the C and Y Connections
Optionally, you can enable S-Video functionality for the amplifier by connecting the C (chroma) and Y (luma) pads on the amplifier to the SNES’s S-RGB chip. RGB is typically viewed as a superior option to S-Video, making this step somewhat redundant, but it only takes 5-10 minutes to complete and does not negatively affect any other aspect of the mod.
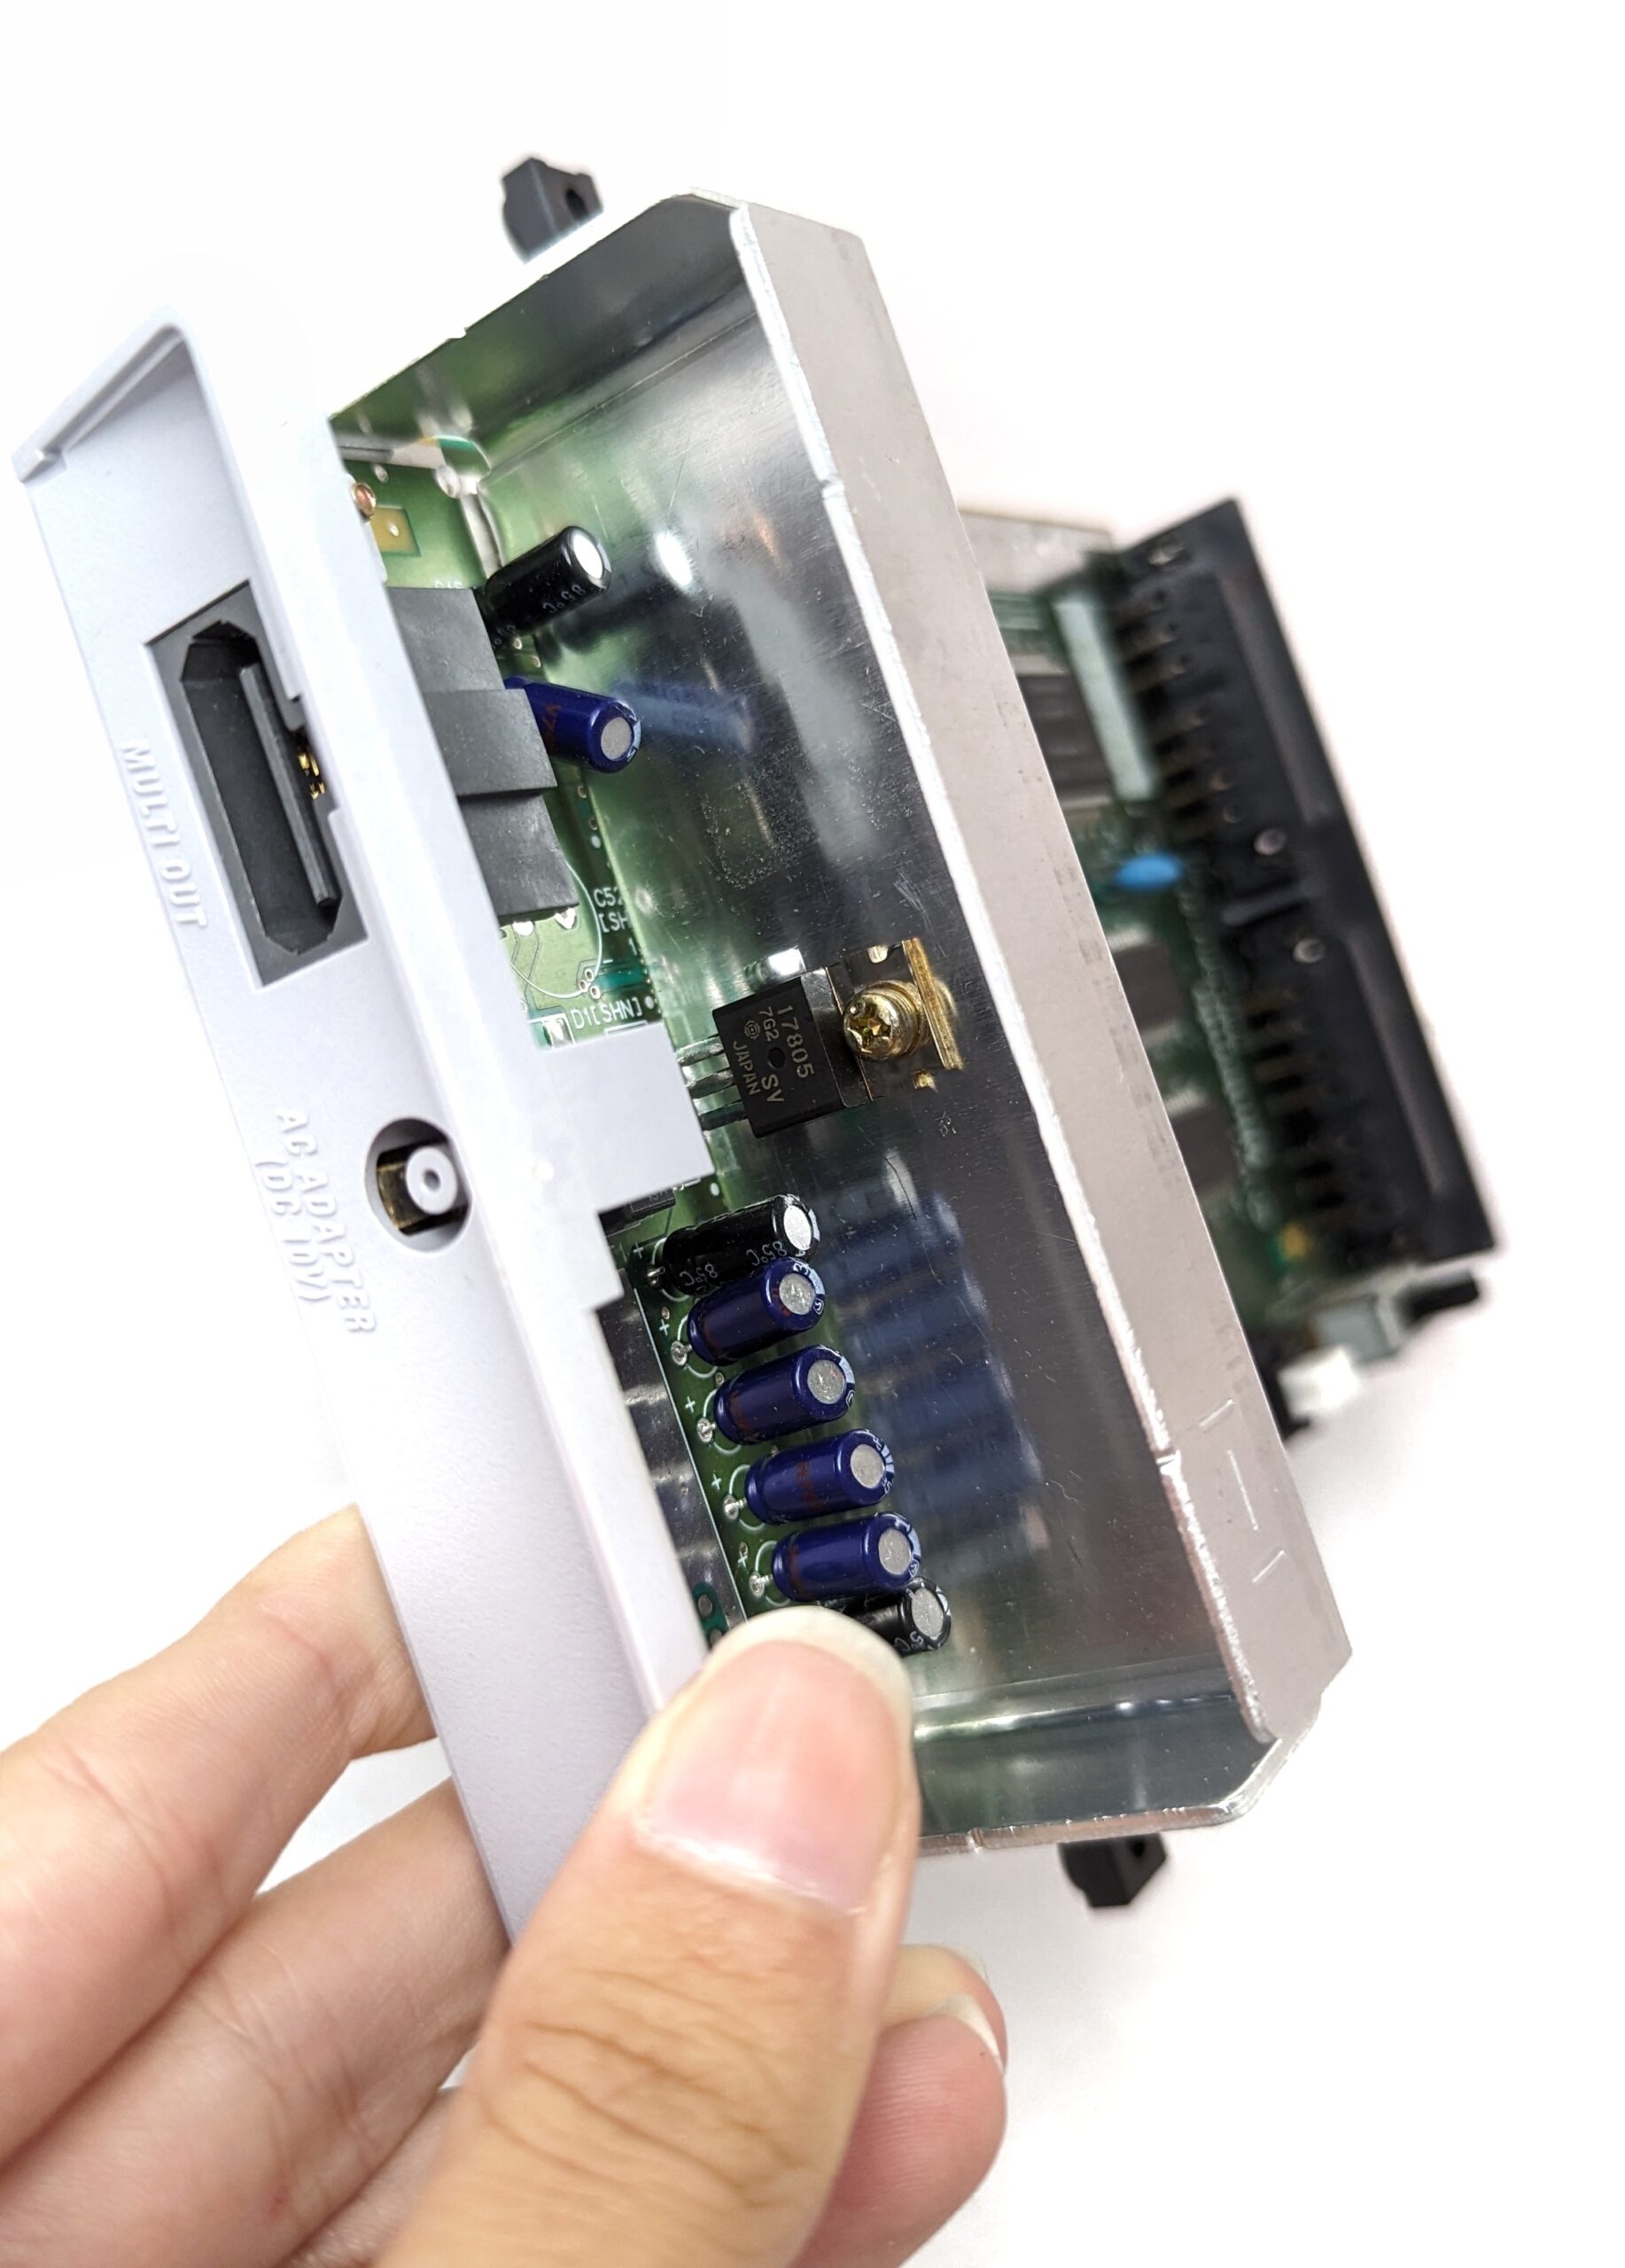
First, you will need to remove the heat shield on the opposite side of the SNES’s PCB. There are three screws holding it in place which can be removed using a Phillip’s Head screwdriver.
 |
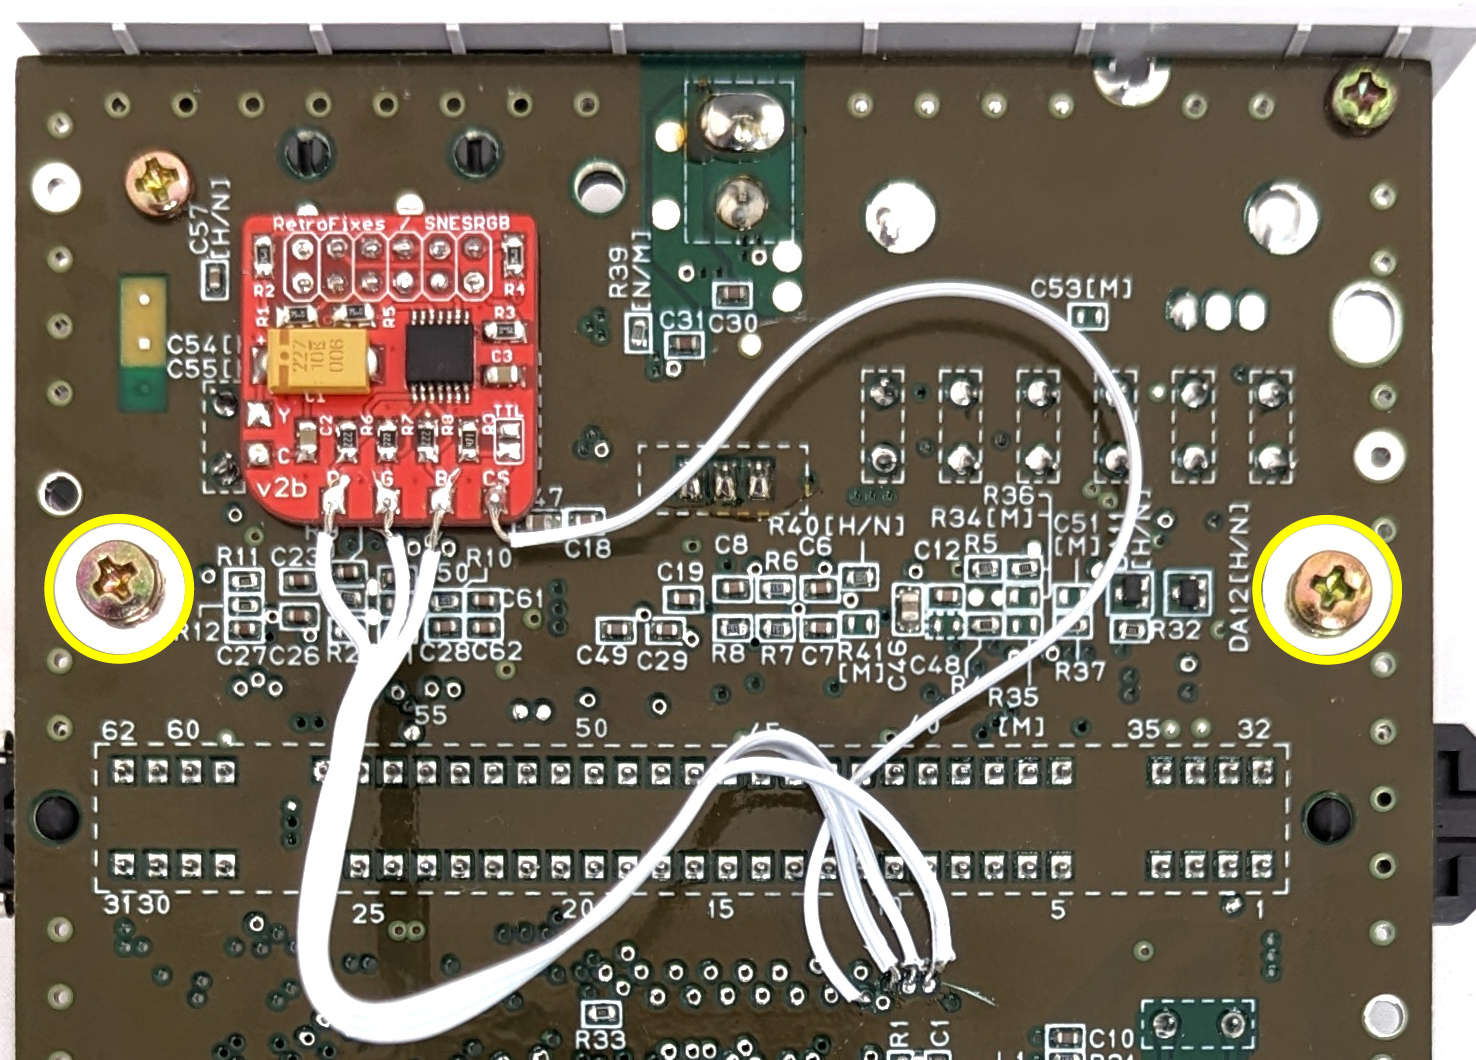 |
| One screw, holding the heat shield in place | Two screws, on the opposite side of the PCB, holding the heat shield in place |
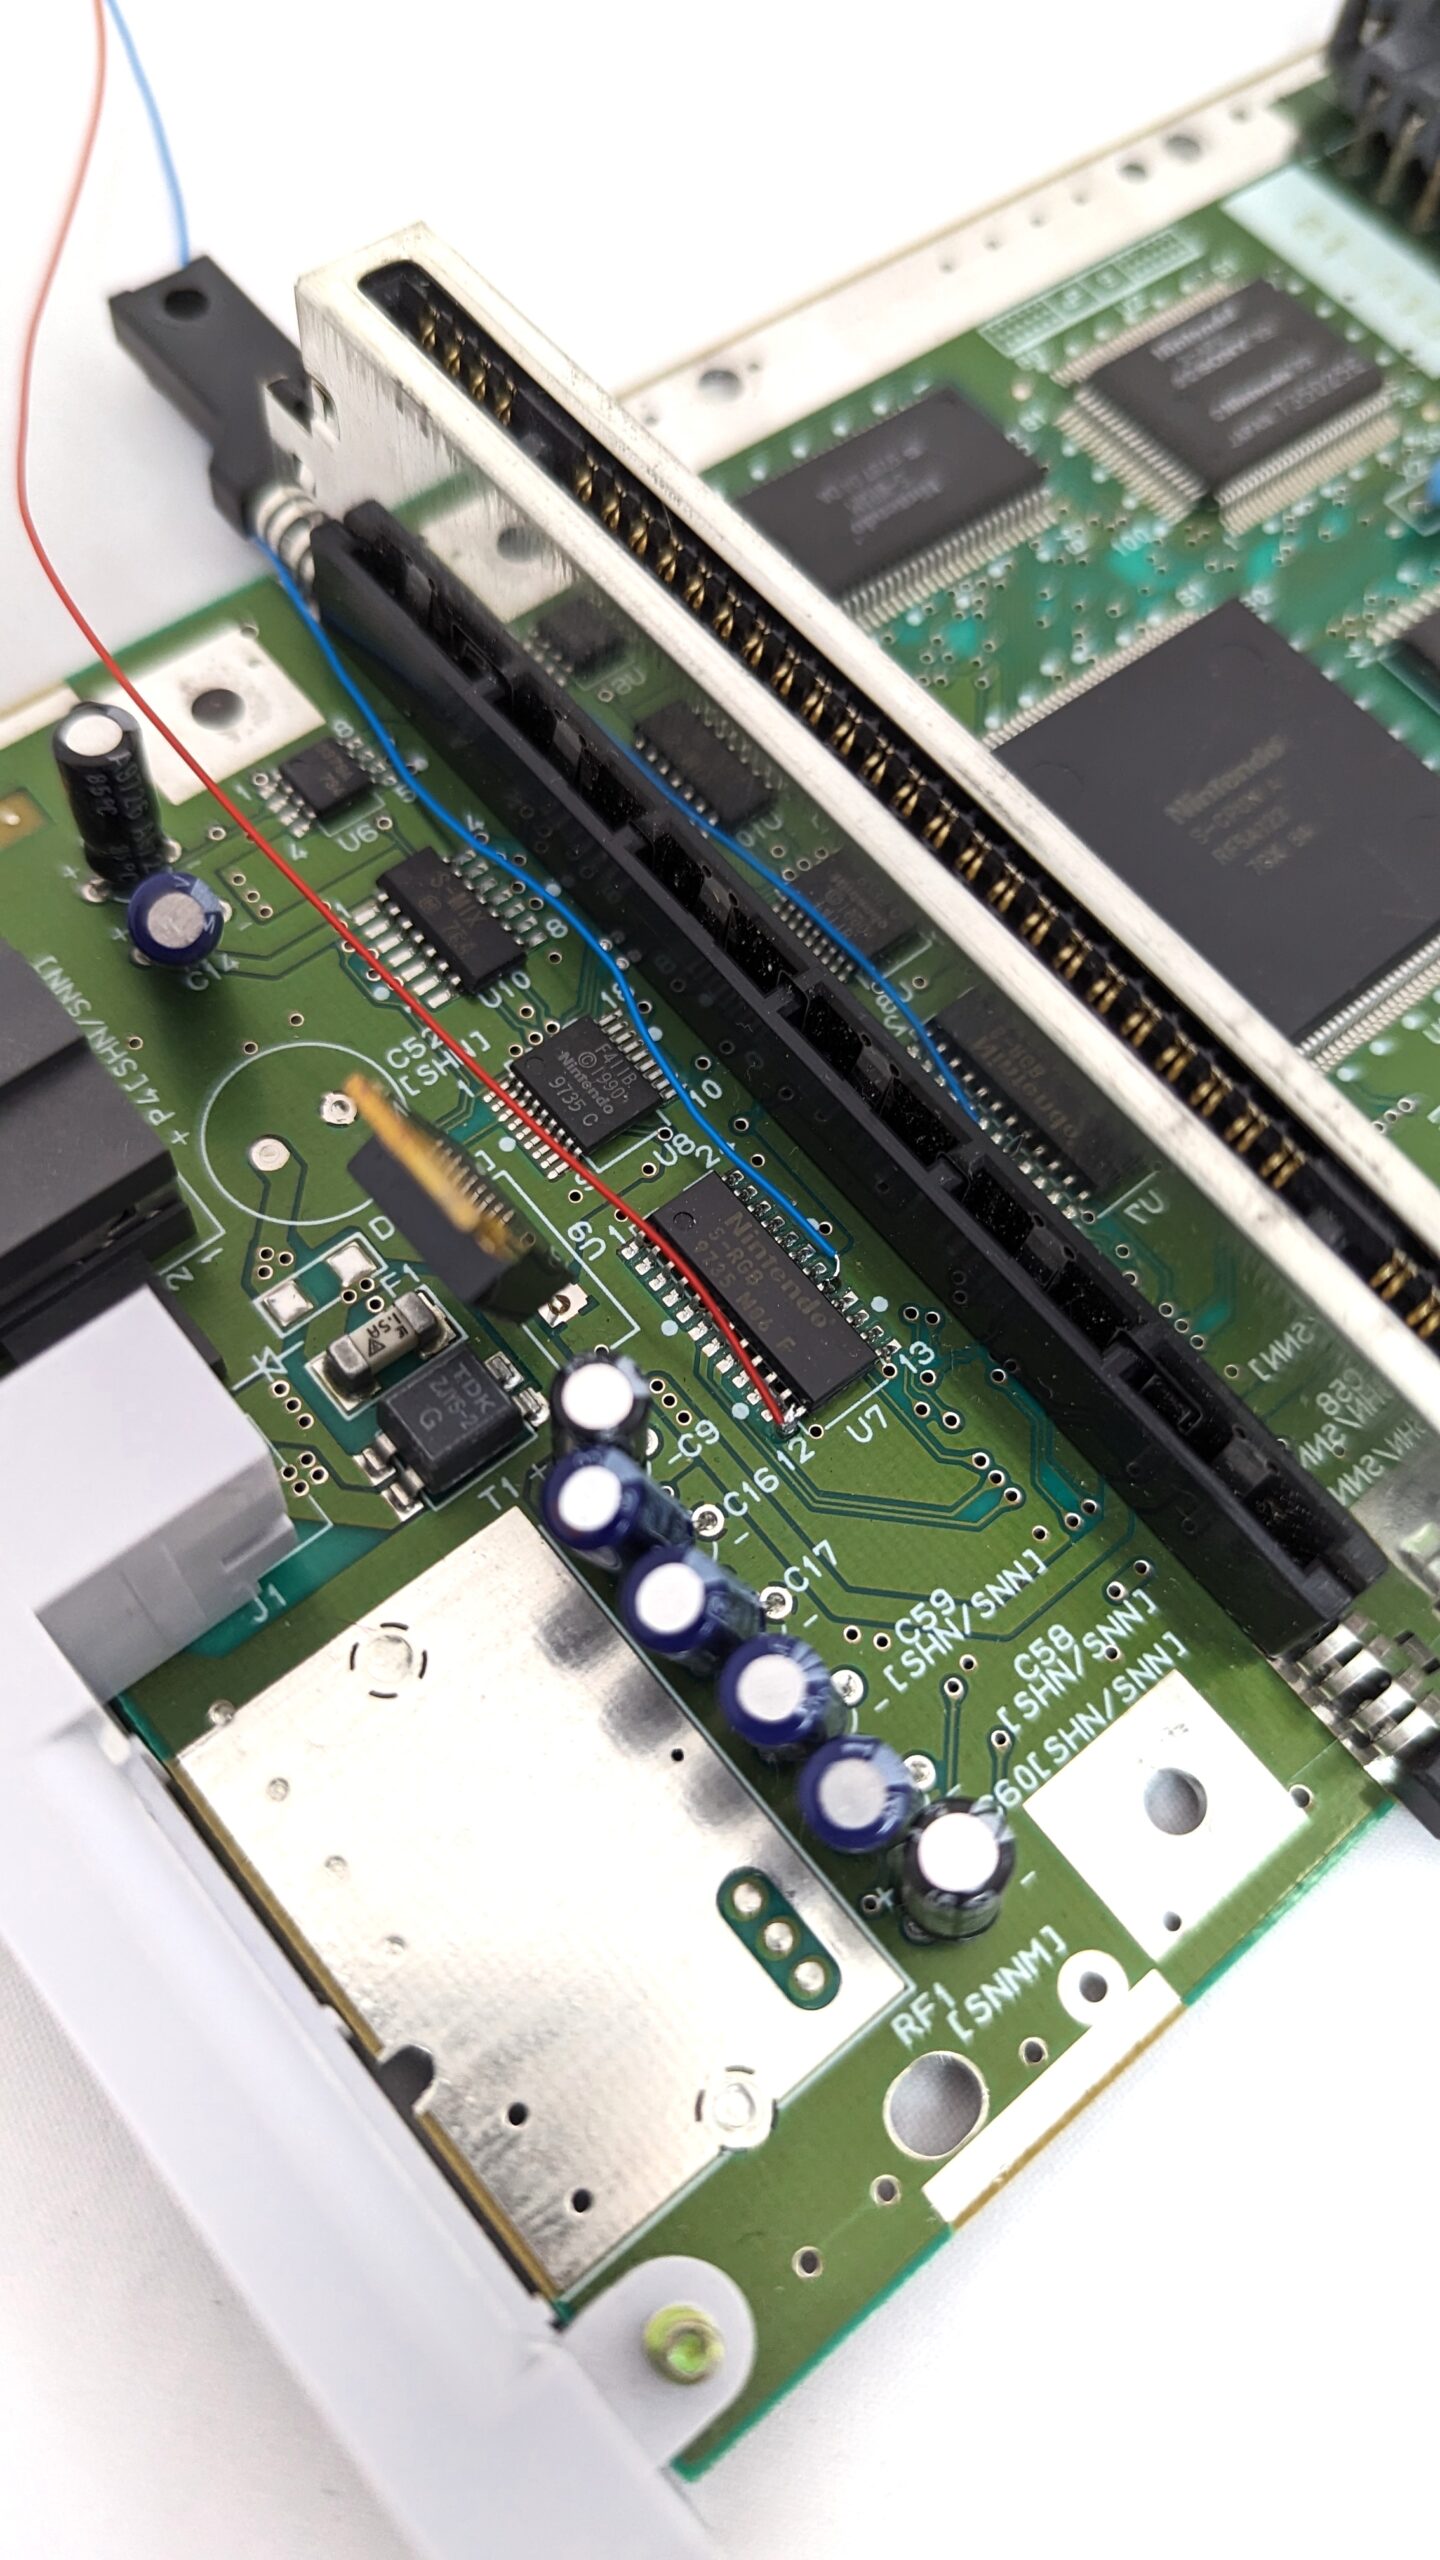
Next, locate pins 12 and 17 on the SNES’s S-RGB chip, using the photograph below as a guide. You’ll notice that the corners of the chip are labelled with 1, 12, 13, and 24 for easy identification. As you will be soldering wires to pins 12 and 17, add a small glob of solder to each pin to prepare it.
Cut two lengths of wire that are long enough to: a) attach to the S-RGB chip; b) run around the side of the console’s PCB; c) solder to the C and Y pads on the amplifier. Strip the ends of each wire, lightly tin them, then do a quick test to make sure they are long enough.
Finally, solder the two wires. The first should connect pin 12 on the S-RGB chip to the C pad on the amplifier. The second should connect pin 17 on the S-RGB chip to the Y pad on the amplifier.
 |
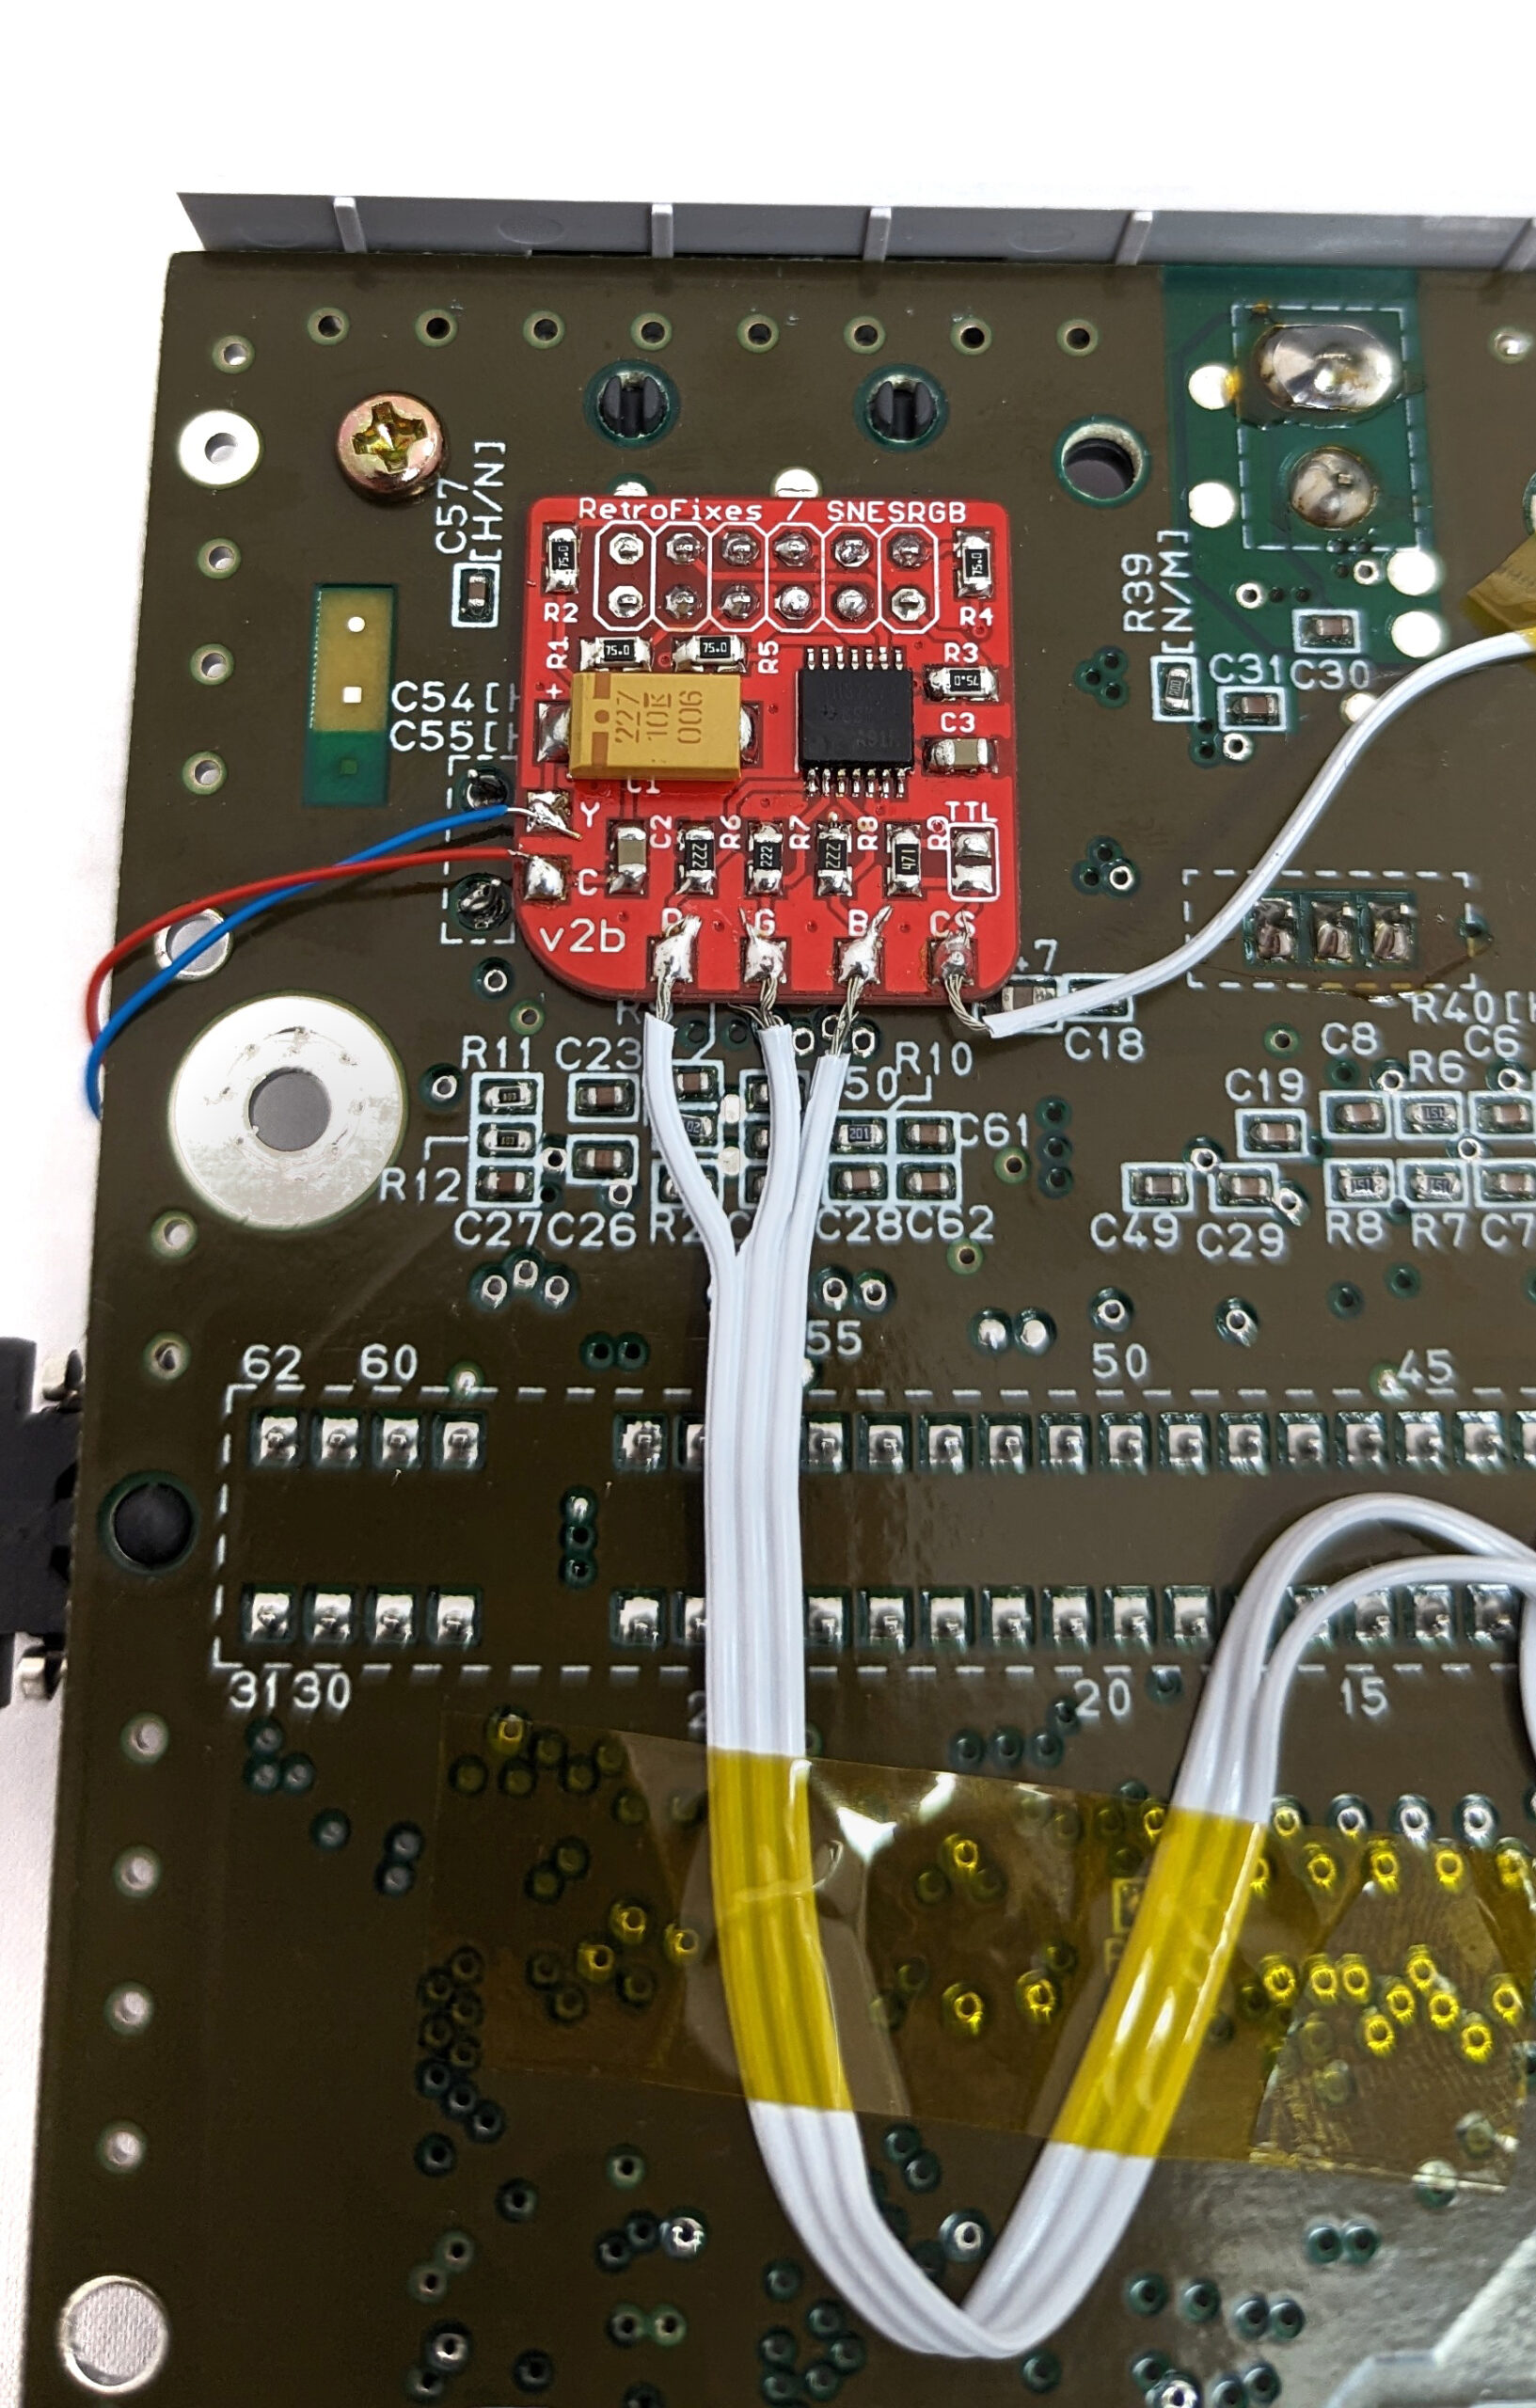 |
| Blue and red wires connecting to pin 12 and 17 on the SNES’s RGB chip | The same blue and red wires soldered to the amplifier |
Note: The S-RGB Chip’s pins are very close together. Make sure that you do not accidentally bridge the neighbouring pins together.
Step 7: Reassembly
Before you put the SNES back together, you should secure any loose wires to make sure that they will not get in the way of reassembly. As we cut our wires a touch too long, we decided to hold them in place using Kapton tape.
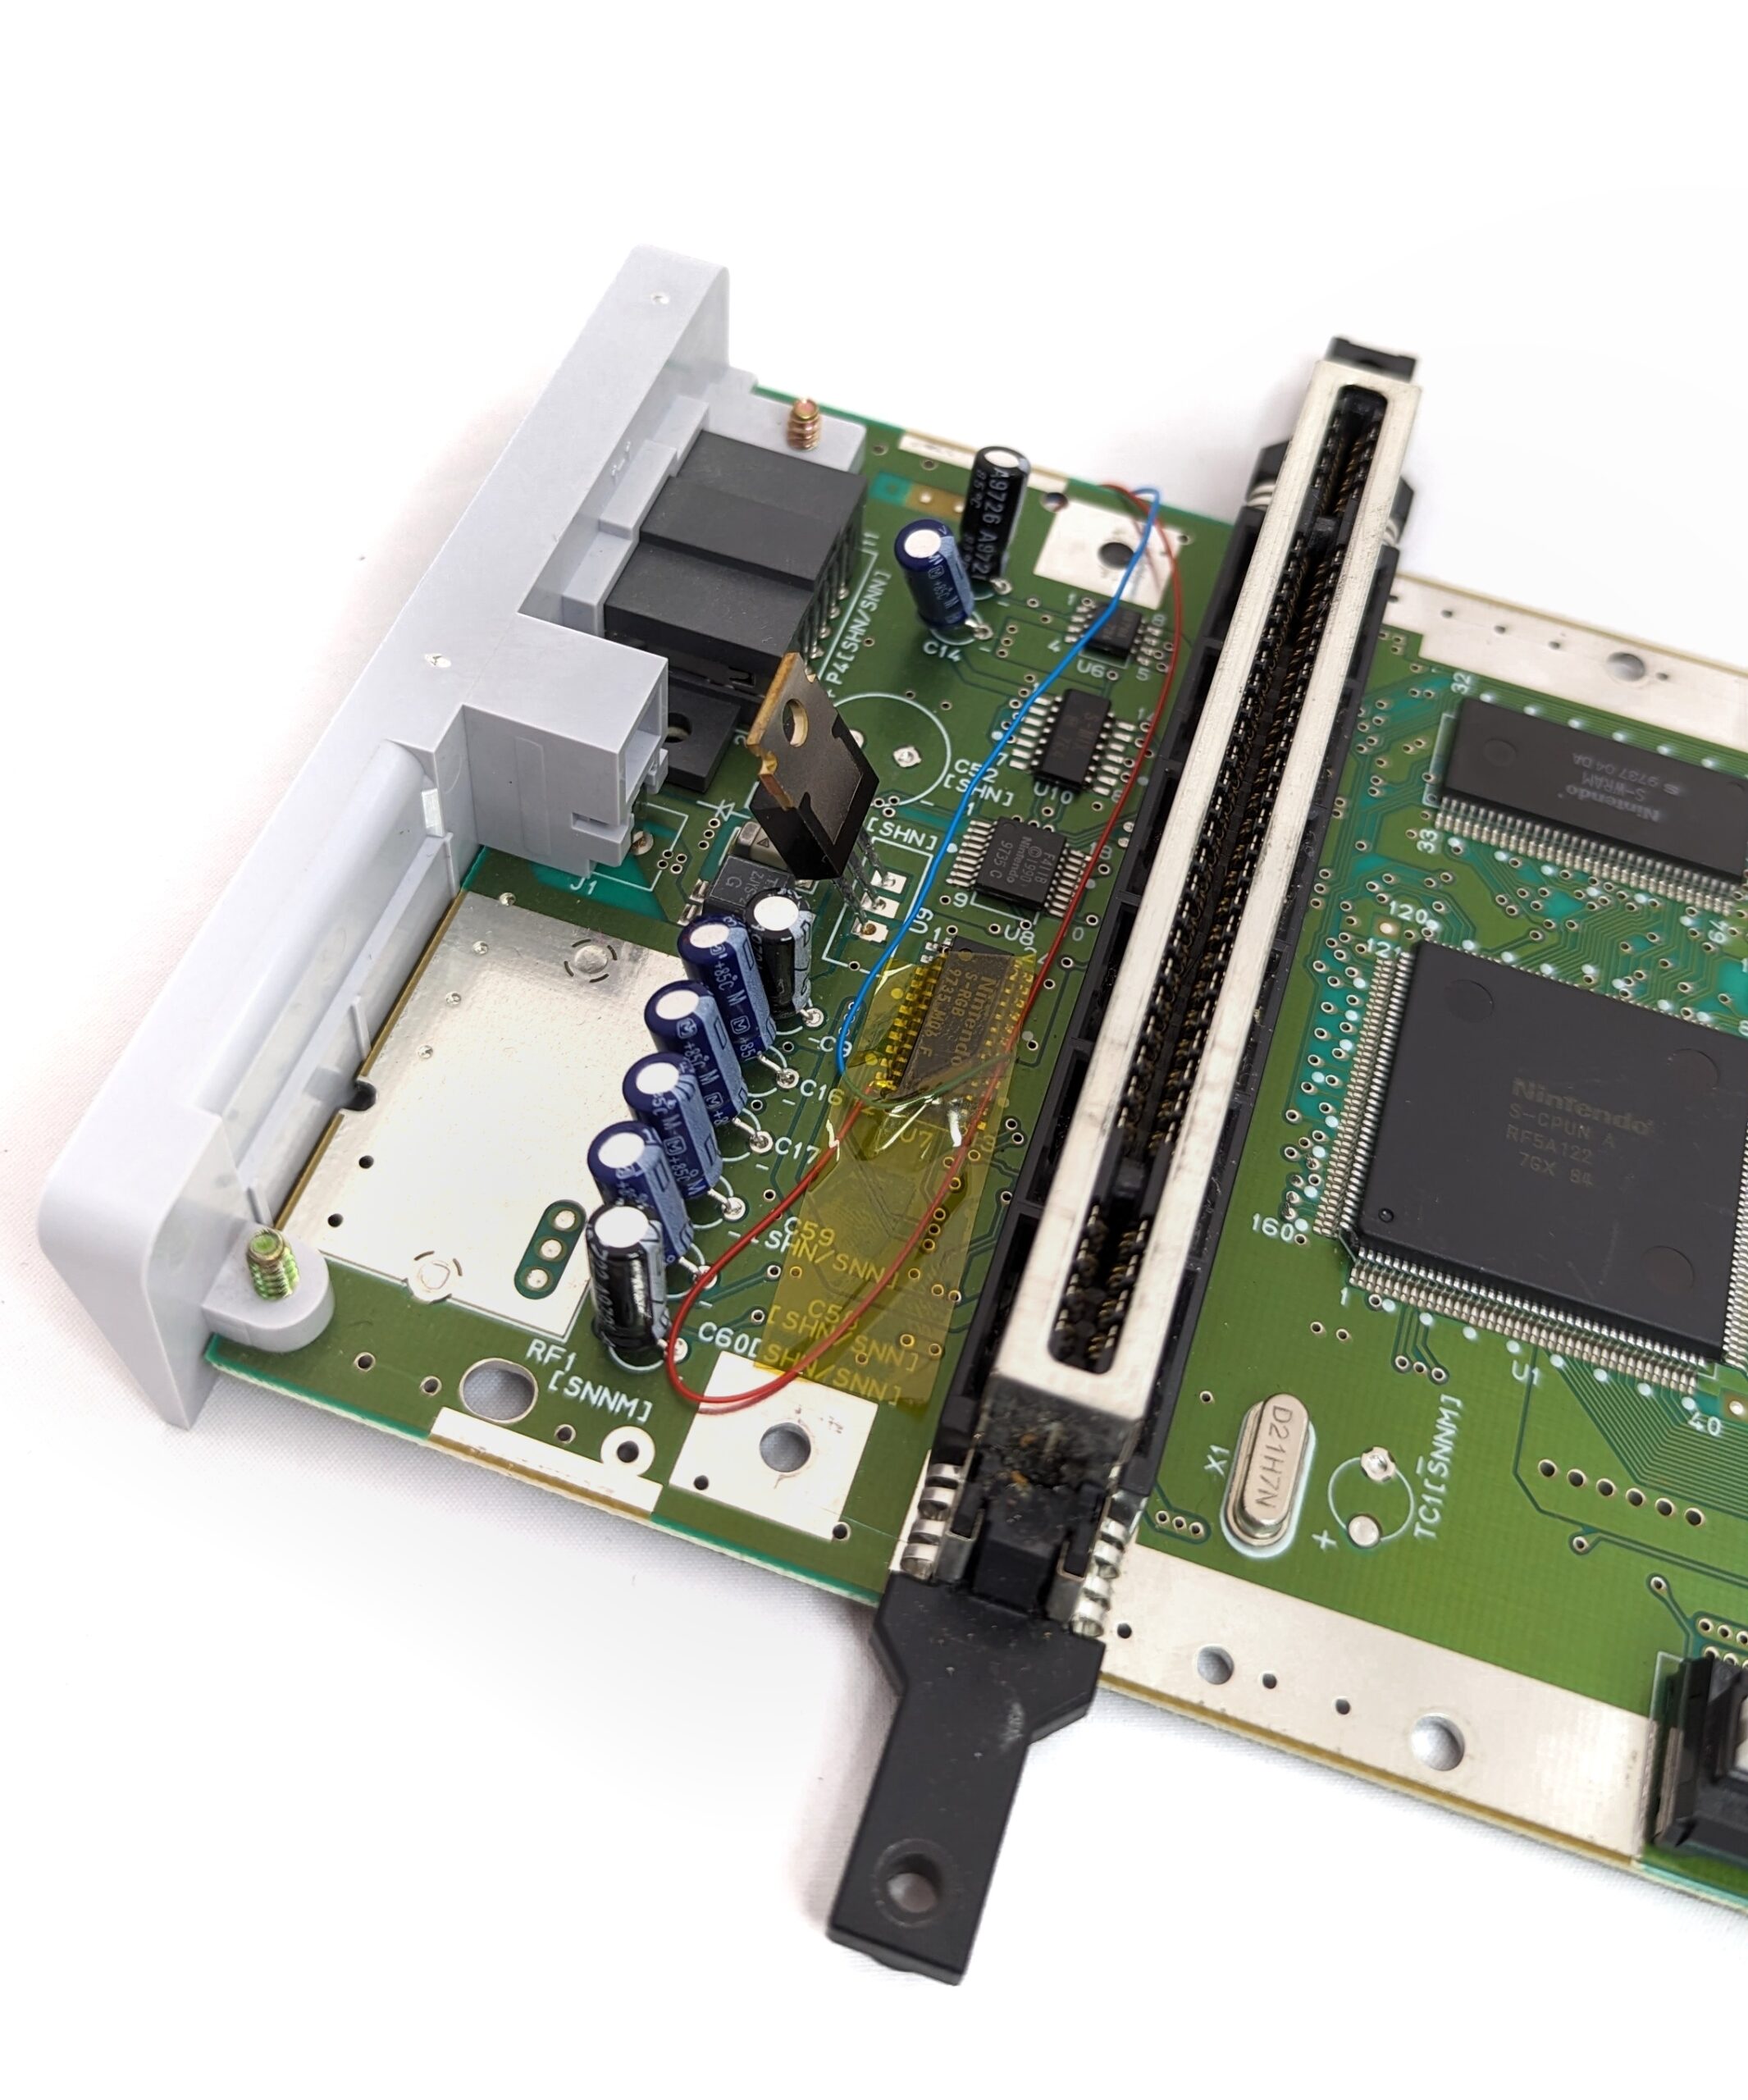
Next, reassemble the SNES in the reverse order of assembly:
- Attach the heat shield to the PCB using three screws.
- Secure the cartridge slot and the Multi Out port to the plastic case using three long screws.
- Affix the PCB to the top of the case using four screws.
- Finally, close up the plastic case using the four 4.5mm Security Bit screws.
Step 8: Reassembly
Once the SNES is reassembled, test it using a SCART Multi-Out cable! The signal should be much improved but, as with all claims to superiority, there is some subjectivity involved.
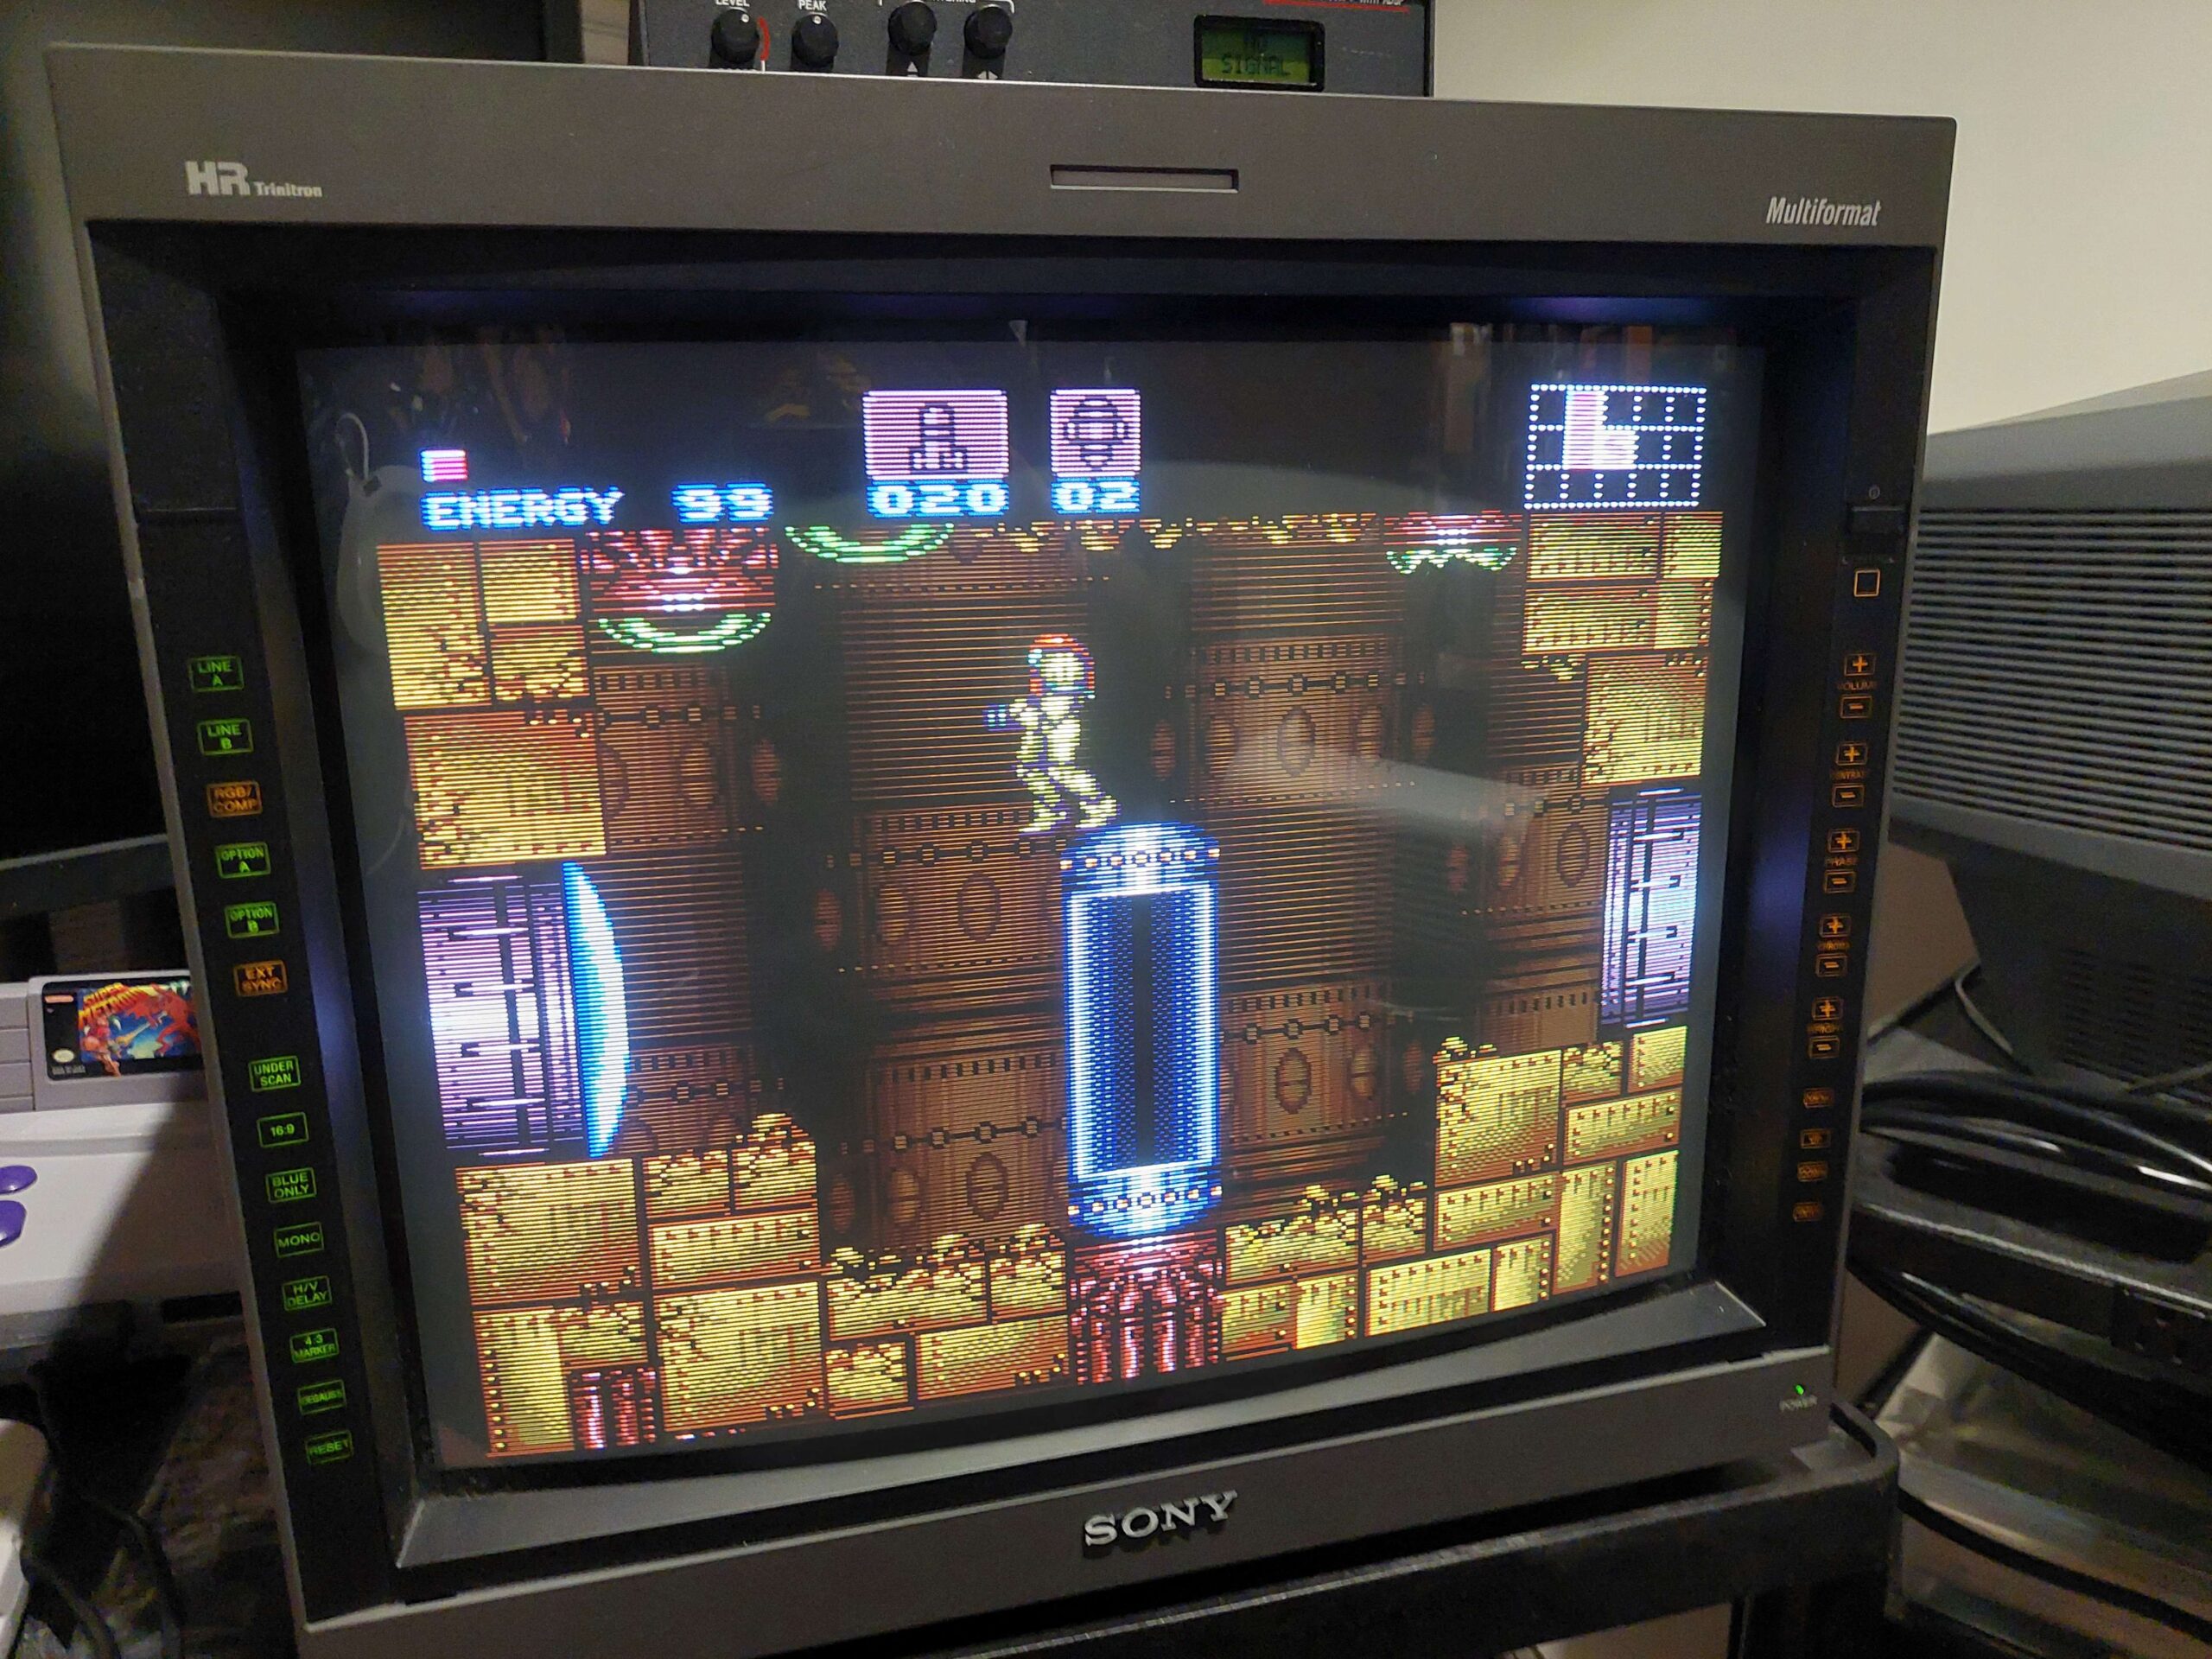
Nintendo consoles have a tendency to include unused, or at least underutilised, capabilities. In this mod we explored a hobbyist attempt to reactivate one of these latent affordances—the ability to output RGB video—but this is by no means the console’s only secret. North American SNES owners, for example, may be perplexed by the existence of an EXT port at the bottom of the console. While this port was briefly used in Japan for use with the Satellaview, there are no official products that connect to it in the Western world, leaving it in the realm of imaginary uses and affordances for North American users.
RGB mods are firmly planted in the realm of enthusiast discourse; particularly, hobbyists who strive to get the best video signal from their videogame console while still maintaining an aura of “authenticity” by rooting such efforts in original hardware (rather than emulation or reproductions). This mod is a great introduction into these ongoing discursive negotiations, as it is easy to complete but requires research on video signal types to fully understand and appreciate. We recommend it as a beginner project and a good “gateway mod” for those interested in more advanced console modifications.